


Table of Contents
Can you tell me how many contacts in your organization have complete mailing addresses using Salesforce data validation address fields? Most admins cannot. Salesforce does not require reps to fill in address fields before saving a record. A rep can create a contact, leave every address field blank, and save it without a single warning.
That gap breaks territory reports, blocks location-based segmentation, and creates campaign-readiness issues when incomplete records enter your send lists.
Native validation rules can close part of this gap by stopping bad data at the point of entry. But they only check whether a field is filled and whether the format looks right. They do not verify that an address is real, and they do not scan your existing records or campaign lists before send time. So the fix is not one tool; it is a layered approach.
This guide walks you through that full stack: mapping the right address fields, building validation rules that actually enforce completeness, cleaning the records that already exist, and knowing where native tools stop so you can plan for what comes after. Every section ends with something you can configure in Setup today.
What Salesforce Address Fields You Need to Validate
Salesforce stores addresses on Contact, Account, and Lead using five sub-fields: Street, City, State, PostalCode, and Country. Each object uses different API names for these fields, and using the wrong name in a formula gives you a syntax error or a rule that quietly does nothing.
Standard Address Fields on Contact, Account, and Lead
Before you write a single formula, you need the exact API names for each object. Get one wrong, and your rule either breaks or silently does nothing.
- Contact uses the Mailing prefix: MailingStreet, MailingCity, MailingState, MailingPostalCode, MailingCountry.
- Account splits into Billing (BillingStreet, BillingCity, BillingState, BillingPostalCode, BillingCountry) and Shipping (ShippingStreet, ShippingCity, ShippingState, ShippingPostalCode, ShippingCountry). Pick whichever set your workflow uses.
- Lead drops the prefix entirely: Street, City, State, PostalCode, Country. Most formula-copy mistakes happen right here.
Always target these individual sub-fields in your formulas. If you reference the compound name (like MailingAddress), the rule will not work.
Why Salesforce Compound Address Fields Behave Differently
You might expect to just check the Required box on an address field. Salesforce will not let you. Address fields are compound, so the Required checkbox is grayed out. You can mark a sub-field as required on a page layout, but that only covers reps on that layout.
API calls, Data Loader imports, and Flows skip page layout rules entirely. A validation rule is the only enforcement that works across every save method.
How State and Country Picklists Help Standardize Address Data
If your org has "CA," "Calif.," and "California" sitting in the same field, State and Country Picklist fixes that by replacing free-text entry with dropdowns. But it only controls which values are allowed, not whether a value is required.
A rep can still save a blank State field unless you build a validation rule to block it. The picklist handles standardization. Validation rules handle completeness. You need both.
How to Build Validation Rules for Salesforce Address Fields
You create Salesforce address validation rules in Setup under Object Manager by selecting your object and clicking Validation Rules. Each rule uses a formula that fires when the data is invalid and blocks the save. These rules apply to every save method, including manual edits, API calls, Data Loader imports, and Flows. If automated processes need to skip the rule, add NOT($Permission.Bypass_Address_Validation) using a custom permission.
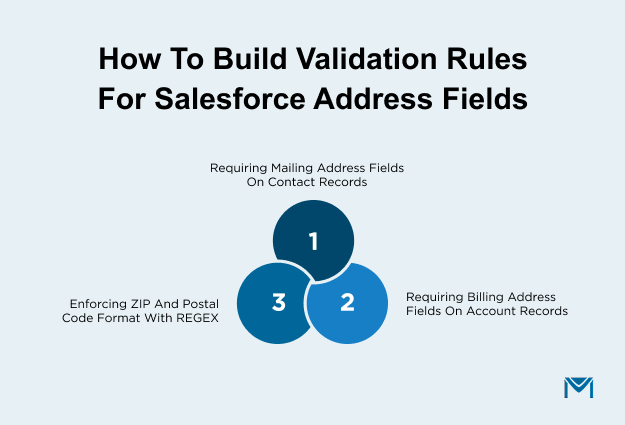
Requiring Mailing Address Fields on Contact Records
Start with the four fields reps leave blank most often. The formula is:
OR(ISBLANK(MailingStreet), ISBLANK(MailingCity), ISBLANK(MailingState), ISBLANK(MailingCountry))
This blocks the save when any one of those fields is empty. If you also want ZIP required, add ISBLANK(MailingPostalCode) to the OR, but keep it separate from the format check in the REGEX section below.
Not every contact needs a full address. If only records enteringemail campaigns require it, wrap the formula in a conditional: AND(Mass_Email_Eligible__c, OR(ISBLANK(MailingStreet), ISBLANK(MailingCity), ISBLANK(MailingState), ISBLANK(MailingCountry))).
This lets reps save early-stage contacts without hitting the rule on every record.
Requiring Billing Address Fields on Account Records
Same logic, different field names. The formula is:
OR(ISBLANK(BillingStreet), ISBLANK(BillingCity), ISBLANK(BillingState), ISBLANK(BillingCountry))
If your org pushes the parent Account's billing address down to child Contact records, this one rule handles both objects. One validation at the Account level means fewer rules to manage and cleaner data flowing into yourcampaign reports.
Enforcing ZIP and Postal Code Format with REGEX
A filled ZIP field is not the same as a correctly formatted one. "abcde" passes the blank check but fails every downstream process that reads postal data. The US format rule for Contact is:
AND(MailingCountry = "United States", NOT(ISBLANK(MailingPostalCode)), NOT(REGEX(MailingPostalCode, "\\d{5}(-\\d{4})?")))
For Account records, swap in BillingPostalCode and BillingCountry. Always wrap REGEX rules in a country condition so they only fire on the right population.
Keep format validation as its own separate rule from your completeness checks. This gives you the flexibility to turn off formatting enforcement during a bulk import without removing the required-field gate. If you run regular data loads, apre-campaign data quality checklist helps catch these issues before they reach your send list.
How to Validate Lead and Custom Address Fields
To validate Lead address fields in Salesforce, use the same ISBLANK and REGEX formulas you built for Contact and Account, but replace the field names. Lead fields use Street, City, State, PostalCode, and Country with no prefix. For custom address fields, the naming convention changes further, covered in the sections below.
Lead Address Validation Rule Formulas
Lead fields are just Street, City, State, PostalCode, and Country. No prefix. The formula is:
OR(ISBLANK(Street), ISBLANK(City), ISBLANK(State), ISBLANK(Country))
For Salesforce zip code validation, the REGEX rule is:
AND(Country = "United States", NOT(ISBLANK(PostalCode)), NOT(REGEX(PostalCode, "\\d{5}(-\\d{4})?")))
Think of the Lead rule as the pre-conversion gate and the Contact rule as the post-conversion gate. You need both active if your workflow includes Lead-to-Contact conversion. Keep error messages identical across objects so reps see the same wording regardless of where they are working.
Custom Address Field Rules and Naming Differences
Managed packages often create custom address fields that duplicate standard ones. Before you write a rule, figure out which field is the source of truth for your workflow. Building validation on both creates conflicting enforcement and confuses reps who do not know which address field actually matters.
Custom sub-fields follow a different naming pattern than standard fields: CustomFieldName__Street__s, CustomFieldName__City__s, CustomFieldName__Country__s.
The formula logic stays the same. Only the API names change.
One more thing to check: custom address fields do not always integrate with the State and Country Picklist. If picklist standardization is not active for your custom field, free-text values will still get through. Your validation rule becomes the only quality gate at the point of entry.
Lead Conversion Mapping for Address Data
Salesforce does not automatically carry Lead address data to the Contact record on conversion. You configure the mapping yourself: Setup, Object Manager, Lead, Map Lead Fields.
The five mappings to verify:
- Street to Mailing Street
- City to MailingCity
- State to MailingState
- PostalCode to MailingPostalCode
- Country to MailingCountry
If this mapping is missing, a converted Contact arrives with a blank mailing address even when the Lead had all five fields filled. The Lead validation rule passed, but the Contact has nothing. This looks like a bug, but it is a configuration gap.
Test the full flow in a sandbox before going live: create a Lead with a complete address, convert it, and confirm the Contact record shows all five Salesforce required address fields populated.
How to Clean Existing Records Before Enabling Address Validation
Clean your existing records before you activate any validation rule. If you enable a rule on an object with thousands of incomplete records, Salesforce locks every affected record for edits until someone fills in the missing fields. Build the rules first, clean the data second, enable the rules third.
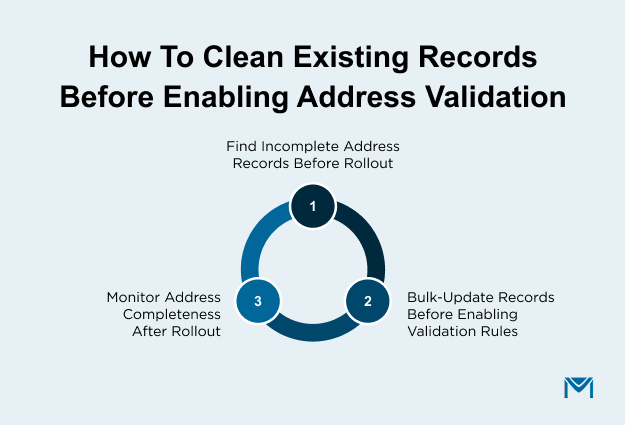
Find Incomplete Address Records Before Rollout
Create a Contacts report and filter for blank values in MailingStreet, MailingCity, or MailingPostalCode.
- Add columns for all five address fields plus Contact Owner so you can see what is missing and who owns each record.
- Group by Contact Owner so team leads can assign cleanup directly from the report.
- Schedule the report weekly and email results to the CRM admin until the blank count hits zero.
If 10,000 contacts have blank addresses, the rule locks every one of them. These are the same contacts that fall out ofSalesforce email campaigns because of incomplete segmentation data.
Bulk-Update Records Before Enabling Validation Rules
Pick your method based on volume.
- For large batches, use Data Loader. Export the report as a CSV, fill in the missing fields, and push the corrected data back with the Update operation.
- For under 200 records, use list view inline editing. Filter to blank MailingCity, select all, and update without leaving the page.
- For Leads heading toward conversion, clean the address on the Lead first. The conversion mapping pushes that data to the Contact, so fixing the source prevents incomplete records from enteringmarketing automation workflows.
Monitor Address Completeness After Rollout
Cleanup is not a one-time event. You need ongoing visibility.
- Build a dashboard that tracks the percentage of contacts with all five address fields populated. Add it to the CRM admin's home page.
- Set up a scheduled Flow that creates a task for the record owner whenever a contact is missing a required address field.
- If the blank count starts climbing, trace it to the source. API integrations that skip address fields on record creation are the most common cause.
Review the dashboard before every campaign cycle. Catching gaps before the send is cheaper than handlingbounced emails after.
If address completeness affects campaign eligibility, validation rules should be paired with a pre-send list check so older or API-created records do not slip into sends.
What Salesforce Validation Rules Cannot Do?
Salesforce address validation rules check whether a field is filled and whether the value matches a format you defined. They cannot check whether an address actually exists. "123 Main Street, Springfield, IL 60000" passes every ISBLANK and REGEX rule, but ZIP code 60000 does not exist in the US postal system.
| Need | Native Validation Rules | State/Country Picklists | Address Verification Tool | MassMailer |
|---|---|---|---|---|
| Require blank fields | Yes | No | Sometimes | Detects before send |
| Standardize country/state values | No | Yes | Yes | Depends on the record data |
| Verify the deliverable address | No | No | Yes | No |
| Check the campaign list before sending | No | No | No | Yes |
Completeness vs. Standardization vs. Verification
Completeness means the fields are populated. Your ISBLANK formulas handle this.
Standardization means the values follow a consistent format. REGEX and State and Country Picklist handle this.
Verification means the address is real and deliverable against a postal authority database. No native Salesforce tool does this. Not validation rules, not the picklist, not autocomplete. Verification is a fundamentally different operation from checking whether a field is blank.
When Native Rules Are Enough, and When You Need Address Verification
Native rules are enough when your goal is data completeness for CRM reporting, territory assignment, list segmentation, or email footer compliance. Everything you built in the previous sections covers these use cases.
External verification is the next step only when you need to confirm that the address is a real, deliverable location. That applies to direct mail, field service dispatch, fraud prevention, and any workflow where something physical gets sent to that address.
AppExchange offers verification tools that run directly inside Salesforce, handling both real-time checks at entry and batch verification on existing records.
For teams runningmass email from Salesforce, a pre-send data quality check catches what validation rules structurally miss: contacts with technically complete but outdated addresses, records that entered through API integrations without address review, and entries that should never have reached the send list.
Tools like MassMailer run this check inside Salesforce before each send, so the gap between validation rules and actual campaign readiness stays closed.
The decision comes down to one question: do you need the field correct, or do you need the place real?
How Address Validation Supports Email Readiness and Compliance
Contact address validation and sender address validation serve two different purposes in Salesforce. Contact validation keeps your segmentation and routing data clean. Sender validation, however, makes sure your email footer includes the physical address that CAN-SPAM requires in every commercial email.
Contact Address Validation vs. Sender Address Validation
Contact validation targets the MailingStreet, MailingCity, and other sub-fields you built rules for earlier. It controls which contacts land in the right lists and territories.
Sender validation, on the other hand, targets the physical postal address in your email footer. This comes from your organization's record, not from any individual contact. So even if every contact has a perfect mailing address, your emails can still fall short of compliance if the sender record is incomplete.
Here is what most admins miss: CAN-SPAM Section 5 requires the sender's address, not the recipient's. In Salesforce, it lives in Setup, Company Information. Yourmass email campaign tool reads this record to populate the footer.
Which Sender Address Fields Matter for Email Footers
A blank ZIP or a missing City on the sender record makes every email from that setup non-compliant. Five fields must be present: Street, City, State, ZIP, and Country. Find them under Setup, Company Information. If your tool pulls the footer from an Account record instead, check the Billing fields on that Account.
Verify this once during initial setup, then again whenever the sending organization changes. MassMailer pulls this footer automatically from your Salesforce org record, so a missing field there affects every campaign you send through it.
Conclusion
You now have validation rules on Contact, Account, and Lead that block blank and badly formatted address fields across every save method. Your existing records are clean, and your dashboard catches new gaps as they appear.
But native rules only enforce completeness and format. They do not verify that an address is real, and they do not check your send list before a campaign goes out. Contacts saved before the rule existed, records that came in through an API, and entries with technically complete but outdated data can still reach your audience.
That is the gap between data validation and campaign readiness. Validation rules handle the first half. A pre-send quality check handles the second.
See how MassMailer flags incomplete and outdated address data inside Salesforce before your campaign sends, so the gaps your validation rules cannot catch never reach your recipients.
Frequently Asked Questions
1. How do I bypass address validation rules during a Data Loader import?
2. Do Salesforce address validation rules fire during Lead conversion?
3. Can I validate address fields inside a Salesforce Screen Flow?
4. Do address validation rules apply to Web-to-Lead address fields?
5. Do address validation rules work on Person Account records?
6. Can I apply different address validation rules by record type?
Start Your Free Trial Today
Experience MassMailer the easiest way to send personalized emails from Salesforce.
Related Blogs


MassMailer Resources


MassMailer Glossary
About the Author

Siva Devaki 
Siva Devaki is the founder of MassMailer Inc., a tool that helps Salesforce users optimize email marketing. A passionate advocate for email marketing, Siva writes and hosts podcasts on the topic, sharing insights to help businesses drive revenue and enhance customer engagement through Salesforce email automation and tracking.