


Table of Contents
Email deliverability (not to be confused with email delivery) is vital when running large-scale email campaigns.

For the uninitiated, email delivery is a successful transmission to the sender's server. Email deliverability, meanwhile, is achieved when that email lands in the intended recipient's inbox—the latter is the important bit.
If you send out too many emails at once to a single organization's recipients, you risk your emailsbeing blocked outby spam filters. The probability of this happening is even higher if the enterpriseis runningaggressive spam filters.
To address this issue,MassMailernow allows you to stagger emails instead of sending them out in bulk. This blog will walk you through how to set up this functionality to run smoother, more successful email campaigns. Read on!
Why Should You Consider Adding Delays When Sending Emails?
Email providers—whether enterprise servers or consumer platforms—are designed to detect and filter out suspicious activity.
Send too many emails to them at once and it raises red flags within their spam filters that eventually get you blocked or your emails land up in the spam folder.
Here is why delaying your email sends matters in this scenario:
- Prevents Spam Blocks From Large Organizations:Enterprise companies, especially large ones like Cisco or Microsoft, for example, have aggressive spam filters that automatically block bulk emails sent to multiple employees at once. By spacing out emails to multiple recipients within the same organization, you mitigate the risk of your emails being flagged as spam or rejected altogether.
- Prevents the Same With Personal Email Providers: Free email providers like Google and Yahoo employ automated filtering to detect mass email activity. Sending emails progressively to recipients with these domains works the same as enterprise-grade spam filters.
- Improves Open Rates: The higher the number of emails delivered successfully to inboxes, the higher the possibility of improved open rates and increased engagement.
With that said, let's take a closer look at the features of MassMailer’s Email Delay Solution and the mechanism behind it.
MassMailer’s Email Delay Solution: A Brief Overview
MassMailer's built-in email delay feature is adeceivinglysimple solution to overcome all of the issues discussed when sending out bulk emails.
At the core of this solution is a specialized campaigntypecalled the "Mass Mailer Delay Campaign," which introduces additional configuration options that give users more control over how their emailsare sent. The key fields included within this new campaign type are:
- Sender Details:This field allows you tospecify the sender name and email address to ensure consistent branding and compliance.
- Template API Name:This allows you to definewhich email template willbe used, ensuring that the correct contentis sentto recipients.
- IP Pool:This is an optional feed that allows you to assign specific onesto better manage the email routing and your reputationwhen multiple IP addresses are available.
The Mechanism Behind The Feature
MassMailer's email delay feature uses a counter-based logic to stagger email deliveries. Each company domain receives an assigned sequential counter, determining the order in which emails are sent. This means that rather than sending all emails to a single organization at once, the emails are processed one at a time per domain in a controlled sequence.
For example:
- IBM → Counter 1 (first email sent)
- Microsoft → Counter 2 (second email sent after the set delay)
- Cisco → Counter 3 (third email sent after another delay)
Once an email is processed, the system resets the counter and continues sending emails progressively. This prevents excessive email traffic from hitting a single company’s mail server at once.
This email delay solution also allows you to:
- Define time gaps (e.g., 5-10 minutes) between emails sent to the same domain.
- For better engagement, define time as the duration of emails that are to be sent, i.e., during specific business hours (e.g., 9 AM–5 PM).
Note: This feature is currently available only for campaigns.
Now, let’s dive into the step-by-step process of how to set up this functionality.
How to Set Up a Mass Mailer Delay Campaign?
Setting up a MassMailer Delay Campaign in MassMailer is a straightforward process, and the following are the steps to follow:
Step 1: Create a New Campaign
Navigate to the "Campaign" tab within the MassMailer app and create a new campaign.
(If you are new to MassMailer, you can learn more about its various tabshere.)
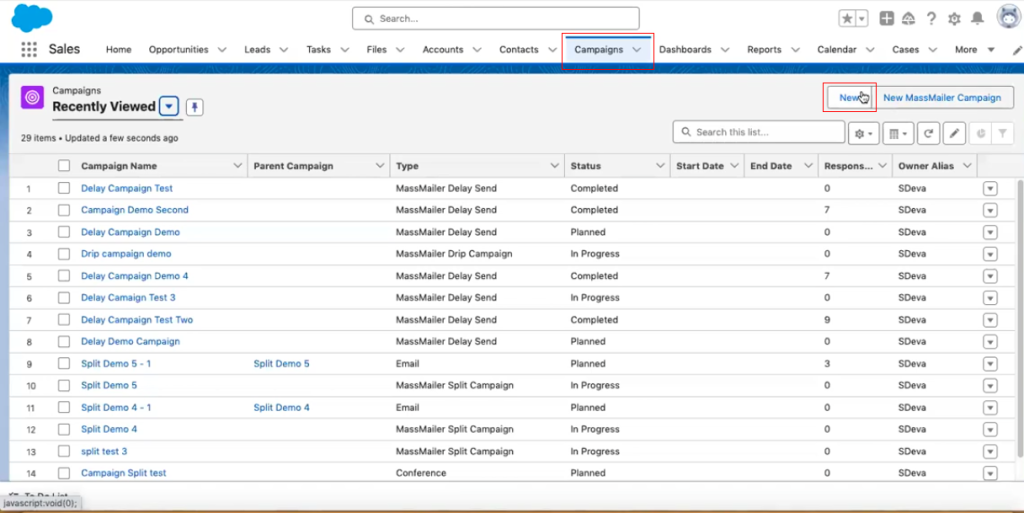
Enter a campaign name and save it.

Step 2: Add Campaign Members
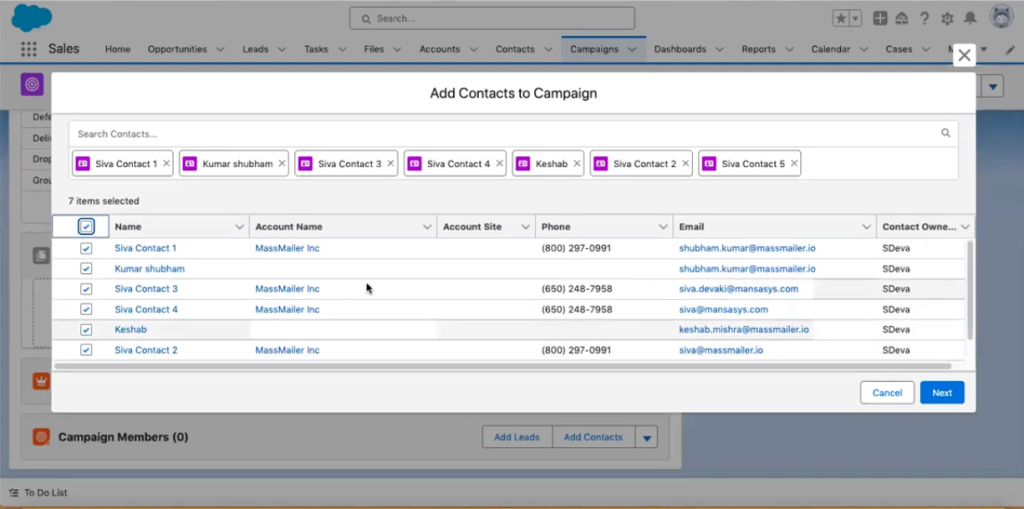
Once done, scroll down to the "Campaign Members" section of the new campaign and click "Add Contacts" to add recipients for this campaign.
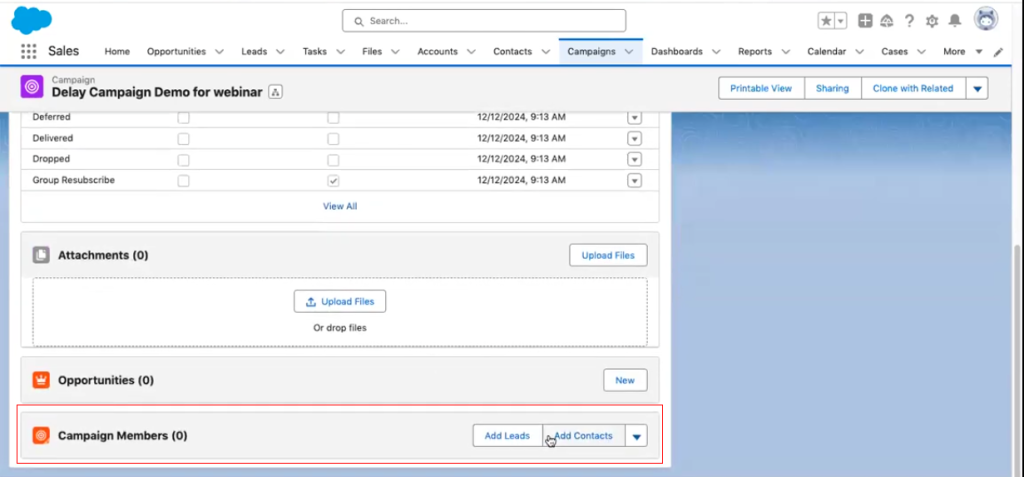
For this functionality to work, ensure that your email list includes recipients from multiple domains.
Step 3: Change the Campaign Type
Once the recipients are added to this campaign, the next step is to change the campaign type to "Mass Mailer Delay Campaign." You can access the edit option by clicking on the downward arrow icon highlighted in the screenshot below.
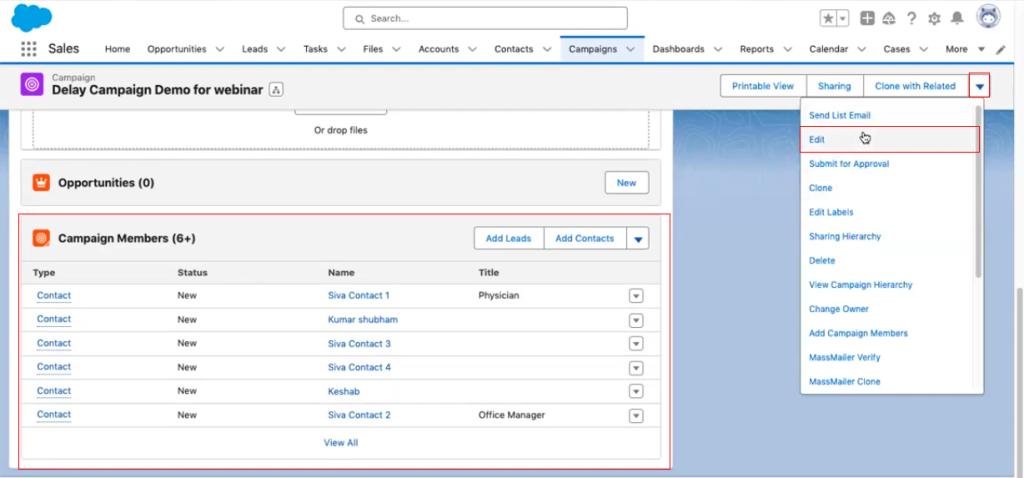
Note: This step is critical, as it activates the counter-based sending logic that ensures emails are spaced out properly.
Step 4: Configure Email Sending Details
While at this stage, you must also enter values for the following fields:
- From Name & From Email that will specify your (the sender's) identity.
- Reply-To Email that will define where recipient responses should be sent.
- Template API Nameto specify which email template is to be used for the campaign.
- The Delay Time to specify the time delay between emails being sent within the same domain.
If needed, you can also set a time window for sending emails. You also need to ensure that you select "Active Status" and set the campaign status to "In Progress" to initiate the campaign the moment you hit save.
Step 5: Save The Campaign
Once you verify all the values and click "Save," MassMailer will automatically initiate the campaign and stagger the emails based on the specified values.
Best Practices To Get The Most Out Of This Feature
The following best practices will help you get the most out of MassMailer's delay-sending feature:
- Use a delay of at least 5 minutes to avoid raising any flags in spam filters.
- Double-check your campaign settings before you activate it.
- Limit the number of emails you send during business hours to maximize your engagement.
- As always, monitor and refine the configuration of the campaign as needed.
Remember, toimprove email deliverability, you need to optimize email timing and ensure your email content follows best practices.Thisincludes personalizing emails, avoiding spammy words, and maintaining a healthy sender reputation. It will help you achieve higher open rates, better engagement, and long-term email success.
Summing It Up
If you rely on large-scale email campaigns and are dealing with low deliverability due to spam filters, this feature should solve all your problems in one fell swoop.
Whether you're reaching out to enterprise clients or personal email users, this functionality will help you protect and preserve your sender reputation, resulting in more successful campaigns.
MassMaileris a powerful email solution built for Salesforce users. It offers features that extend beyond standard Salesforce email capabilities.MassMailer equips businesses with everything they need to run targeted, high-volume email campaigns effortlessly.
Ifyou're looking fora seamless and scalable way to manage your email outreach, start your15-day free trialtodayto witness its capabilities.
Start Your Free Trial Today
Experience MassMailer the easiest way to send personalized emails from Salesforce.
MassMailer Resources


MassMailer Glossary
About the Author

Siva Devaki 
Siva Devaki is the founder of MassMailer Inc., a tool that helps Salesforce users optimize email marketing. A passionate advocate for email marketing, Siva writes and hosts podcasts on the topic, sharing insights to help businesses drive revenue and enhance customer engagement through Salesforce email automation and tracking.