


Table of Contents
Introduction
If you’ve ever spent hours exporting CSV files just to get your subscriber data into Salesforce, you know the pain. It’s time-consuming, tedious, and the worst part? It doesn’t always work smoothly.

Here’s the thing: It’s not the tools you’re using; it’s that they’re not talking to each other. Your marketing team is in one system, sales is in another, and the data just doesn’t flow smoothly between them.
So, what happens? Leads fall through the cracks, follow-ups get missed, and everyone’s scrambling to piece things together.
But what if we could fix this by bringing together two powerful tools, Salesforce and an email marketing platform like Moosend, together?
It would automate the flow of data between the email platform and Salesforce, so you spend more time actually closing deals. Such integration would give your team the accurate, real-time data they need to make better decisions faster.
In this guide, we’ll walk you through how to set up the Moosend Salesforce integration step by step, share some tips for keeping everything synced, and even discuss why MassMailer might be a better choice if you need a native Salesforce solution.
Let’s get started.
How to Set Up Moosend Salesforce Integration (Step by Step)
To set up the Moosend Salesforce integration, you can use either of the two methods: using Moosend’s own Salesforce plugin or connecting through Zapier.
But before we get into the technical setup, let’s make sure you have the right prerequisites and permissions in place.
It’s important to check a few boxes:
- Salesforce Permissions: You’ll need Salesforce admin rights or equivalent API access. This ensures you can authorize integrations, manage field mapping, and review logs.
- Moosend Account: Make sure you have access to your Moosend account, along with an active API key. Without it, the plugin or Zapier connection won’t authenticate.
- Data Readiness: Clean your contact lists ahead of time. Duplicates, inconsistent formatting (like phone numbers), or outdated records can cause unnecessary sync issues.
- Salesforce API Limits: Keep an eye on API usage, especially if you’re running frequent syncs. Hitting those limits could cause delays or failures in synchronization.
Now that you have the prerequisites in place, let’s set up the integration using Moosend’s Salesforce plugin first.
Setting Up via Moosend’s Salesforce Plugin
Moosend offers a dedicated plugin for Salesforce, designed to handle the heavy lifting of syncing lists, fields, and engagement data.
Here’s a quick view:
| Steps | Details | Checklist |
|---|---|---|
| 1. Authorize and Connect Accounts | Authorize the connection between Moosend and Salesforce using API key and OAuth. Recheck credentials in case of issues. | - Get Moosend API key - Set up OAuth authentication - Check Salesforce permissions |
| 2. Select Lists / Objects to Sync | Decide which Moosend lists to sync with Salesforce. Map lists to Leads or Contacts and configure sync frequency. | - Choose lists to sync (Leads vs Contacts) - Set sync frequency - Review relevant lists |
| 3. Field Mapping & Data Configuration | Ensure correct field mapping between Moosend and Salesforce (standard/custom fields). Test syncs to ensure smooth data transfer. | - Map standard fields (name, email) - Map custom fields (tags, campaign IDs) - Test syncs |
| 4. Initiate Import & Review Logs | Initiate the first import, track progress, and review logs for errors like missing fields, duplicates, or sync failures. Set up regular log reviews. | - Trigger the import process - Review sync logs for errors - Set up alerts for sync issues |
Let’s dive deeper into each step:
Step 1. Authorize and Connect Accounts
The first step in the process is to authorize the connection between Moosend and Salesforce. Once you’ve installed the plugin, you’ll be prompted to log in to both platforms.
- Moosend API Key: Obtain your API key from Moosend to secure the connection.
- OAuth Setup: Authenticate using Salesforce’s OAuth for secure access. Ensure you grant the necessary permissions for data access.
- Authentication Issues: If the connection fails, check for expired tokens or permissions and reauthorize.
Successfully completing this step enables secure syncing between Moosend and Salesforce.
Step 2. Select Lists / Objects to Sync
Next, decide which Moosend email lists you want to sync with Salesforce. These lists are mapped to Salesforce objects like Leads and Contacts, so choosing the right ones is critical for maintaining clean data.
- Sync to Leads or Contacts: Map your Moosend lists to Salesforce Leads or Contacts based on your business needs.
- Choose Relevant Lists: Sync only the lists that matter to your sales process, like marketing lists to Leads and customer lists to Contacts.
- Sync Frequency: Set sync frequency based on list updates to avoid manual intervention.
Carefully selecting your lists ensures only the most relevant data syncs to Salesforce.
Step 3. Field Mapping & Data Configuration
Correct field mapping ensures that your Moosend data aligns with Salesforce fields, preventing any data loss or errors during the sync.
- Map Standard Fields: Ensure fields like name, email, and company are correctly mapped between Moosend and Salesforce.
- Map Custom Fields: Match Moosend’s custom fields (tags, campaign IDs) to Salesforce’s custom fields.
- Field Type Matching: Ensure that field types (text, picklist) match to avoid errors.
- Test Syncs: Run test imports to spot any issues with field mapping.
Accurate field mapping ensures smooth data transfer and prevents errors.
Step 4. Initiate Import & Review Logs
Once your lists and fields are selected and the mapping is set up, it's time to initiate the first import. Moosend will push the data into Salesforce, and you can track the process in real-time.
- Trigger the First Import: After reviewing your selections, initiate the import. Depending on the list size, it may take time.
- Review Sync Logs: Monitor logs for errors like missing fields or duplicates.
- Resolve Issues Quickly: Check logs regularly for errors and set up alerts for quick issue resolution.
Regularly monitoring logs ensures the integration runs smoothly.
Setting Up via Zapier
If you prefer a no-code solution, Zapier provides an easy way to integrate Moosend and Salesforce without the need for plugins or complicated configurations. With Zapier, you can automate workflows between Moosend and Salesforce, creating new leads, updating contacts, and more with just a few clicks.
Take a quick look:
| Steps | Details | Checklist |
|---|---|---|
| 1. Choosing Triggers & Actions | Select the appropriate trigger in Moosend (e.g., "New Subscriber") and define the corresponding action in Salesforce (e.g., "Create Lead" or "Update Contact"). | - Choose Moosend trigger (e.g., "New Subscriber") - Choose Salesforce action (e.g., "Create Lead") |
| 2. Filtering, Duplicates & Error Handling | Set up filters to avoid duplicates, configure error handling rules, and test your Zap to ensure smooth data sync and correct behavior. | - Set filters to avoid duplicates (e.g., by email address) - Configure error handling - Run test Zap |
Here’s a detailed guide on how to set it up:
Step 1. Choosing Triggers & Actions
The first step in the Zapier setup is selecting the right trigger and action for your workflow. In Zapier, a "Trigger" is the event that starts the automation, while an "Action" is what happens as a result.
- Moosend Trigger: Choose Moosend as the trigger app. Common triggers include "New Subscriber" to capture new sign-ups automatically.
- Salesforce Action: Define the Salesforce action, such as “Create Lead” or “Update Contact,” based on your needs.
- Customizing Triggers: Tailor triggers based on campaign type, subscription source, or tags to fit your workflow.
Setting up the right triggers and actions ensures that Moosend interactions are automatically captured in Salesforce.
Step 2. Filtering, Duplicates & Error Handling
Once you’ve set the trigger and action, it’s important to implement filters and error-handling rules. These features help maintain clean, accurate data in your Salesforce database and avoid common issues like duplicates or incomplete records.
- Avoid Duplicates: Use filters to ensure only relevant contacts sync with Salesforce. For example, filter out duplicates based on email or contact ID.
- Handle Duplicates: Configure Zapier to update existing records instead of creating new ones, preventing data redundancy.
- Error Handling: Set up error notifications to quickly address issues like failed syncs or missing fields.
- Test Zaps: Run a test Zap to ensure everything works as expected and correct any mapping issues before activation.
These settings ensure clean, accurate data syncing while maintaining workflow reliability.
Why Should You Integrate Moosend with Salesforce?
Now that we’ve covered how to set up the Moosend Salesforce integration, let’s dive into why it’s worth the effort.
Integrating Moosend with Salesforce automates email marketing and CRM workflows, improving lead management and data synchronization. This integration streamlines customer engagement by syncing data between Moosend’s platform and Salesforce, allowing real-time updates and personalized communication.
With Moosend Salesforce integration, businesses can enhance sales visibility, track customer behavior, and automate marketing tasks, boosting efficiency and accuracy. It simplifies complex data management processes, enabling teams to focus on growing their business rather than manual data entry and sync errors.
According to Litmus’ 2025 State of Email Report, 29% of companies use Salesforce as their email marketing platform, with adoption higher in enterprise (46%) and mid-market (37%) companies. This highlights the growing reliance on Salesforce for email marketing.
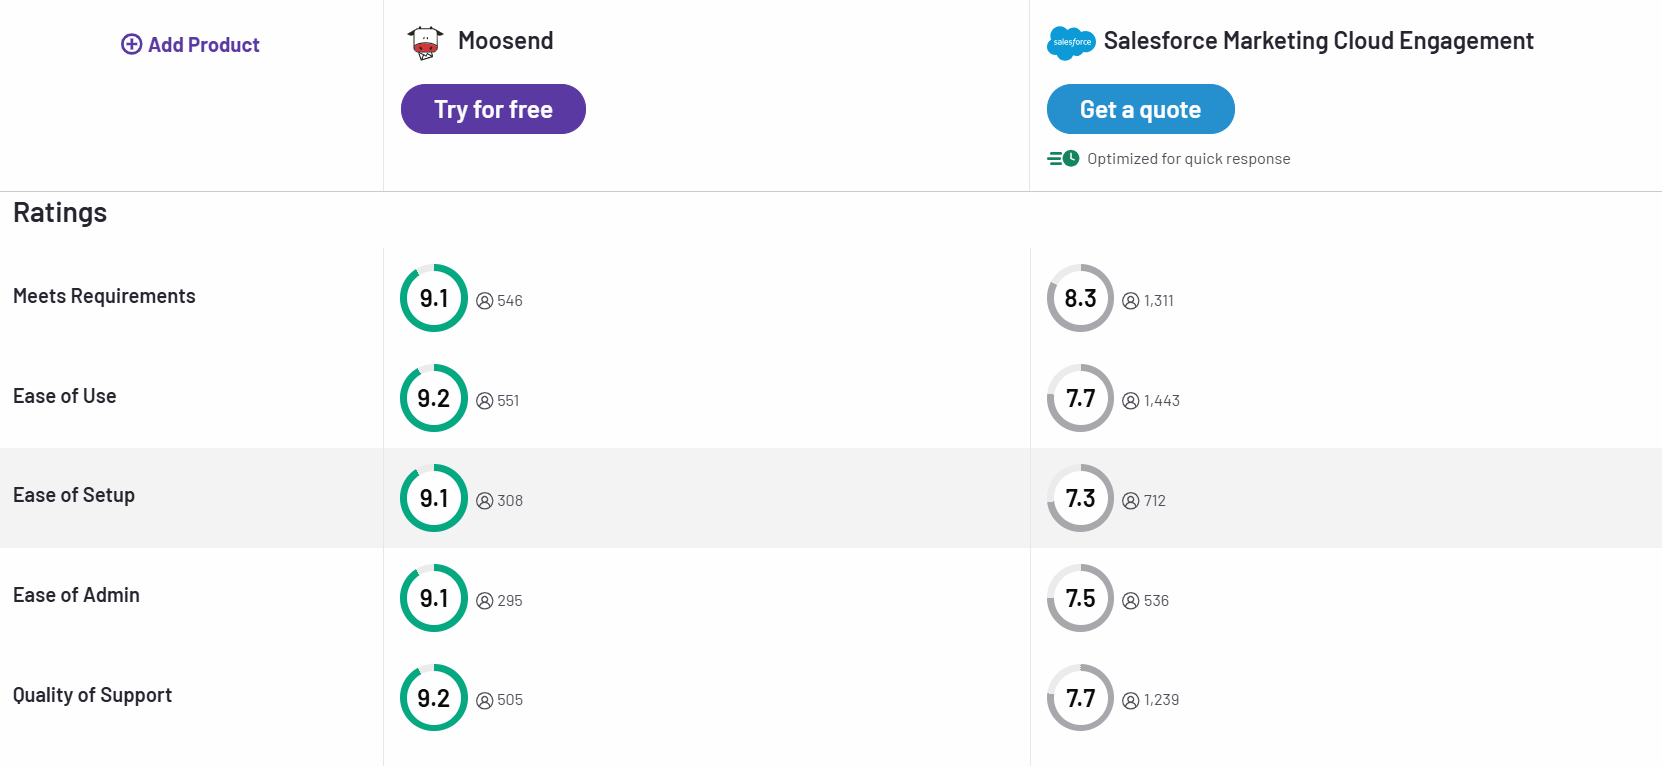
On the other hand, Moosend’s user interface is highly rated for its simplicity and ease of use, earning a score of 9.2 out of 10 on G2, which is notably even higher than Salesforce’s 7.7.
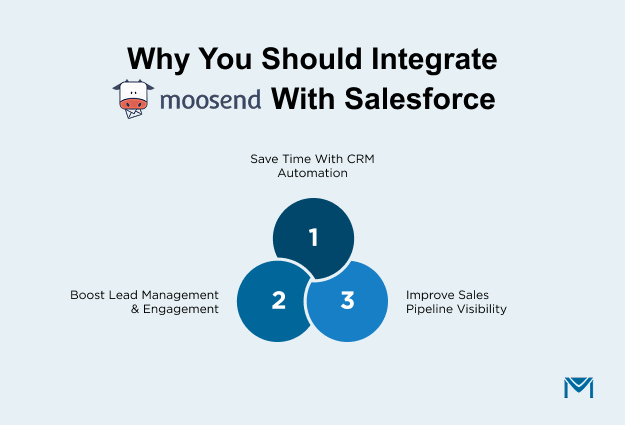
So, here’s why you should consider the integration:
1. Save Time with CRM Automation
Without integration, your team spends countless hours exporting CSVs, updating records, and manually transferring data.
- Automatic Syncing: Subscriber data is seamlessly updated in Salesforce, eliminating manual imports.
- Instant Lead Creation: New Moosend subscribers are automatically added as leads in Salesforce, saving time for your sales team.
- More Selling, Less Admin: With automation, your sales team can focus on selling instead of data entry.
CRM automation accelerates the sales process, freeing up time for more meaningful activities.
2. Boost Lead Management & Engagement
Integrating Moosend with Salesforce improves how you manage and engage leads.
- Real-Time Insights: Track email engagement (opens, clicks) directly in Salesforce, giving sales reps real-time data.
- Personalized Follow-Ups: When a lead engages with an email, sales reps can act quickly, boosting conversion chances.
- Targeted Campaigns: Moosend’s email automation can trigger Salesforce tasks, ensuring timely follow-up and lead nurturing.
The integration ensures smarter, more efficient lead management and engagement.
3. Improve Sales Pipeline Visibility
A unified system gives you a clearer view of your sales pipeline.
- Complete Lead History: All lead interactions, from emails to sales calls, are visible in Salesforce, improving pipeline tracking.
- Data-Driven Decisions: Sales reps can prioritize high-engagement leads and take informed actions based on email interactions.
With Moosend and Salesforce working together, your sales pipeline becomes a well-oiled machine.
Best Practices for Reliable Syncing
Integrating Moosend with Salesforce can transform your workflows, but to get the most value, you need to ensure that syncing happens reliably. Here are the key best practices to maintain smooth and accurate synchronization.
Avoid Sync Latency & Conflicts
Data latency or conflicts can disrupt workflows and lead to missed opportunities. Frequent or near real-time syncing helps keep both platforms aligned.
- Frequent Sync Schedules: For active campaigns, consider setting the sync frequency to every 5–10 minutes. This ensures that new subscribers and engagement data appear in Salesforce promptly.
- Conflict Management: When multiple systems update the same field simultaneously, conflicts can occur. Establish clear rules about which system is the source of truth for each data point.
- Monitor Sync Health: Use dashboards or logs to check whether syncs are completing successfully and spot delays before they become a problem.
By minimizing latency and managing conflicts, your teams always have the most up-to-date information.
Maintain Data Cleanliness
Reliable syncing starts with clean data. Poor data quality can cause errors, duplicates, or misdirected campaigns.
- Deduplicate Contacts: Before syncing, remove duplicate records in both Moosend and Salesforce.
- Standardize Fields: Ensure consistent formatting for emails, phone numbers, and other fields. For instance, use one format for phone numbers and standardize job titles.
- Regular Audits: Schedule periodic reviews of your data to ensure consistency and remove outdated records.
Clean data is the foundation of accurate analytics, automated workflows, and effective lead management.
Use Engagement Metrics to Trigger Sales Actions
Your integration can help you take timely action based on how leads engage with your emails.
- Track Opens and Clicks: Map email opens and clicks from Moosend directly to Salesforce tasks.
- Automate Follow-Ups: For example, create tasks for sales reps when a lead clicks on a demo or pricing email.
- Prioritize Hot Leads: Engagement metrics help identify the most interested leads, allowing your team to focus on high-value opportunities.
By using engagement metrics effectively, you turn raw data into actionable insights that drive sales.
Monitor Errors & Logs Regularly
Regular monitoring helps you catch problems early.
- Access Sync Logs: Both Moosend and Salesforce provide logs detailing successful and failed syncs.
- Set Up Alerts: Configure notifications for failed syncs, authentication issues, or mapping errors.
- Resolve Issues Promptly: Addressing errors immediately prevents them from cascading into larger data problems.
Regularly monitoring logs ensures a smooth integration experience and prevents minor issues from affecting your workflows.
Troubleshooting Common Issues
Integrating Moosend with Salesforce can streamline your workflows, but occasional issues may arise. Here's how to address some common challenges:
1. Authentication Failures
Symptoms:
- Repeated prompts for Salesforce login credentials.
- Error messages indicating invalid API keys or permissions.
Solutions:
- Ensure that your Salesforce credentials are correct and have the necessary permissions.
- Verify that the Salesforce API is enabled in your Salesforce account settings.
- Check for any IP restrictions in Salesforce that might block Moosend's access.
2. Data Mapping Errors
Symptoms:
- Missing or incorrect data in Salesforce records.
- Fields in Salesforce are not updating as expected.
Solutions:
- Review the field mapping settings in Moosend to ensure all necessary fields are correctly mapped to Salesforce fields.
- Ensure that the data types in Moosend match those in Salesforce (e.g., text fields to text fields).
- If using custom fields, confirm that they exist in both Moosend and Salesforce and are properly mapped.
3. Syncing Delays
Symptoms:
- New subscribers or updates are not appearing in Salesforce promptly.
- Lag between actions in Moosend and their reflection in Salesforce.
Solutions:
- Check the sync frequency settings in Moosend to ensure they are set appropriately for your needs.
- Monitor the integration logs in Moosend for any errors or delays during the syncing process.
- Ensure that your internet connection is stable and that there are no network issues affecting the sync.
4. Duplicate Records
Symptoms:
- Multiple entries for the same contact in Salesforce.
- Conflicting data between Moosend and Salesforce records.
Solutions:
- Implement deduplication rules in Salesforce to prevent duplicate records.
- Regularly clean your data in both Moosend and Salesforce to remove duplicates.
- Use unique identifiers, such as email addresses, to match records between Moosend and Salesforce.
5. Integration Logs and Error Monitoring
Symptoms:
- Uncertainty about the status of data syncs.
- Difficulty identifying the cause of integration issues.
Solutions:
- Regularly review the integration logs in Moosend to monitor the status of data syncs.
- Set up notifications for failed syncs or errors to address issues promptly.
- Consult the Moosend documentation for guidance on interpreting log entries and resolving common errors.
By proactively addressing these common issues, you can maintain a smooth and efficient integration between Moosend and Salesforce.
Why MassMailer Is a Better Alternative to Moosend Salesforce Integration
While Moosend’s Salesforce integration offers great functionality, there’s a stronger alternative for organizations looking for a seamless, native solution: MassMailer.
As a fully integrated Salesforce email marketing and automation tool, MassMailer provides a more robust and streamlined experience, especially for teams heavily reliant on Salesforce for their sales and marketing activities.
Let’s explore why MassMailer may be the better option.
1. 100% Native Salesforce Application
MassMailer is fully integrated within Salesforce, eliminating the need for external plugins and sync issues.
- No External Tools: Operates entirely within Salesforce, ensuring smooth operations without external tools or API configurations.
- Instant Sync: Real-time syncing of email marketing and CRM data without relying on third-party integrations.
- Seamless User Experience: Access email campaigns, contacts, and reporting directly from Salesforce.
2. Advanced Email Tracking & Analytics
MassMailer offers more detailed email tracking and integrated analytics within Salesforce.
- Real-Time Insights: Track opens, clicks, bounces, and unsubscribes directly within Salesforce.
- Salesforce Reporting: Email metrics are fully integrated into Salesforce reports, providing deeper insights.
- Granular Tracking: Track individual email engagement for better follow-ups and targeted sales actions.
3. Better Lead Management Without Sync Issues
With MassMailer, you avoid the syncing issues and duplicates common with Moosend.
- Native Lead Management: All leads and email activities are managed directly within Salesforce.
- No Duplicates: Since it’s native, there’s no risk of duplicate records or syncing issues.
- Complete Record Access: All email interactions are automatically linked to Salesforce records for a comprehensive view.
4. Compliance & Deliverability Advantages
MassMailer ensures higher deliverability and compliance than Moosend.
- Salesforce Compliance: Utilizes Salesforce’s native tools to comply with CAN-SPAM, GDPR, and other regulations.
- Better Deliverability: Direct email sending from Salesforce results in higher deliverability rates.
- Custom Unsubscribe Links: Easily customize unsubscribe links to meet legal requirements.
5. Scalable for Bulk Email & Campaigns
MassMailer handles high-volume email campaigns seamlessly.
- Unlimited Emails: Send as many emails as needed without external tool limitations.
- Advanced Campaign Automation: Automate campaigns based on Salesforce data without complex third-party setups.
- Efficient Bulk Sending: MassMailer ensures smooth and efficient bulk sending, even for large campaigns.
With these advantages, MassMailer offers a streamlined, fully integrated solution that eliminates the friction of external tools and enhances your email marketing and CRM workflows, making it a compelling choice for Salesforce users looking to scale their efforts.
A great example of MassMailer’s effectiveness comes from Opal Group, an event-driven company that needed a flexible solution for managing email campaigns tied to custom objects like event registrations.
MassMailer’s seamless integration with Salesforce allowed them to create targeted campaigns effortlessly, remove duplicate email addresses, and send personalized emails on behalf of sales reps. This saved them time, improved workflow, and gave them invaluable insights into campaign performance.
Watch the success story here.
Install MassMailer or book a call with our team to achieve exactly what our clients did with a streamlined email marketing journey.
Key Takeaways
Integrating Moosend with Salesforce can streamline your email marketing and sales workflows, saving time, improving lead management, and boosting overall efficiency. However, depending on your needs, you may find that a native Salesforce solution, like MassMailer, offers even greater advantages.
Here’s a quick recap of the key points:
- Moosend Salesforce Integration: Automates workflows, syncs email engagement data, and aligns sales and marketing teams. Set it up via Moosend’s plugin or Zapier for smooth data flow.
- Best Practices for Syncing: Ensure frequent syncs, clean data, and use engagement metrics to trigger timely sales actions.
- Common Troubleshooting Issues: Resolve authentication errors, mapping mismatches, and syncing delays by checking settings, logs, and permissions.
- MassMailer Advantage: A native Salesforce solution, MassMailer eliminates third-party tools, offers advanced email tracking, and improves compliance and deliverability.
Want a faster, more scalable email marketing solution?
Try MassMailer for a native, integrated experience inside Salesforce. Request a free demo or start your trial today to see how it can elevate your email campaigns.
Frequently Asked Questions
How do I integrate Moosend with Salesforce for my business?
What are the benefits of connecting Moosend with Salesforce?
How can Moosend help automate marketing through Salesforce CRM?
How can I track customer engagement using Moosend and Salesforce together?
What data can be synced between Moosend and Salesforce for better targeting?
Does Moosend Salesforce integration help improve email campaign performance?
Start Your Free Trial Today
Experience MassMailer the easiest way to send personalized emails from Salesforce.
Related Blogs
Salesforce Native Email App: A CRM-First Email Strategy
How to Integrate SendGrid with Salesforce for Better Email Automation
MassMailer Resources


MassMailer Glossary
About the Author

Siva Devaki 
Siva Devaki is the founder of MassMailer Inc., a tool that helps Salesforce users optimize email marketing. A passionate advocate for email marketing, Siva writes and hosts podcasts on the topic, sharing insights to help businesses drive revenue and enhance customer engagement through Salesforce email automation and tracking.