


Table of Contents
Introduction
Would you believe that sending an email in Salesforce becomes simple once the right settings are in place? Many users expect to send a message with one click, but they run into missing buttons, blocked permissions, or emails that never reach the inbox. These issues rarely come from Salesforce itself. They usually come from a few overlooked configuration steps.
Research from McKinsey shows that although nearly 90 percent of companies launch digital transformation efforts, they capture only about one-third of the value. Smooth communication inside core systems helps close that gap. When teams send emails directly inside Salesforce, conversations stay organized, response times improve, and context switching drops.
This guide shows exactly how to send an email in Salesforce with confidence. You learn how individual and mass email work, what setup you need, and how to fix common issues that slow teams down. Each section offers actionable insights, real-world examples, and simple steps you can follow right away.
If sending emails in Salesforce has felt confusing, this guide gives you a clear, reliable path from setup to send.
What does “send email in Salesforce” mean
Sending email in Salesforce means composing, sending, and tracking messages inside the CRM so communication stays connected to the right lead, contact, account, or case. Salesforce stores each message as an EmailMessage record in Lightning Experience, which helps teams view conversations in one place and reduce reliance on external tools.
Types of Emails You Can Send in Salesforce (Individual, Mass, Automated)
Most users search for “how to send an email in Salesforce” because they want to perform one of three core actions:
- Send a one-to-one email directly from a record using the Email tab or the Send email action
- Send a controlled bulk message to many contacts or leads through list views or campaigns
- Trigger simple email alerts when a rule, condition, or workflow matches
These options cover how Salesforce handles email at a practical level. The next sections explain the setup you need, how each option works, and what to do when sending does not behave as expected.
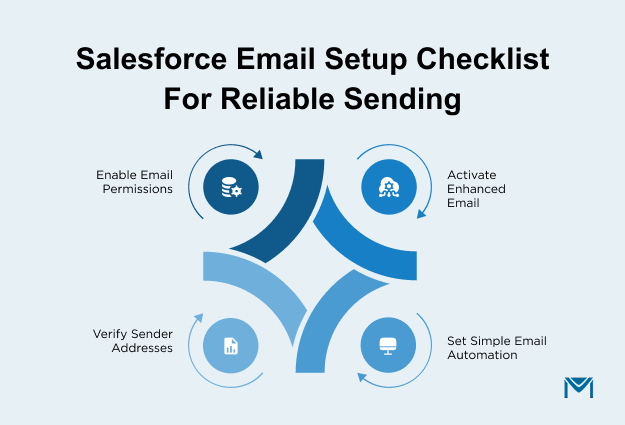
Salesforce Email Setup: Permissions, Deliverability & Verification
Before you can send emails in Salesforce reliably, you need four things in place: the right user permissions, proper deliverability settings, verified sender addresses, and a basic approach for simple email alerts. Getting this setup right prevents most “why is Salesforce not sending my email” issues and gives your team a clean starting point.
The CRM market is massive, valued at USD 63.91 billion in 2022 and projected to reach USD 145.79 billion by 2029. Forrester’s research shows that many CRM efforts fall short not because of the software, but because core features are not configured well. Strong setup helps teams get more value from their CRM investment and keeps email sending smooth from day one.
1. User permissions and feature access
To send an email in Salesforce, users must have the right profile permissions and access to Lightning features. Salesforce also requires each user to verify an email address before sending.
Use this checklist:
- Confirm that each sender has the Send Email permission in their profile or permission set.
- Ensure the Lightning Experience User permission is enabled so users see modern email tools.
- Add the Email tab or Send email quick action to page layouts for leads, contacts, accounts, cases, and key custom objects.
- For teams that send through Gmail or Office 365, grant the Send Email through External Email Services permission where required.
- Ask users to complete Salesforce’s email verification prompt the first time they try to send an email, and confirm that they can see the EmailMessage records on activity timelines.
When this access is set up correctly, your query on “how to send email in Salesforce” becomes available across the records your team works with every day.
2. Enable Enhanced Email and configure deliverability
Enhanced Email turns every message into an EmailMessage record instead of a simple task, which gives better tracking, reporting, and search. Deliverability settings, then decide whether Salesforce can send emails at all.
Set this up in two short steps:
- In Setup → Enhanced Email, enable Enhanced Email so Salesforce stores email as EmailMessage records and ties them to related records.
- In Setup → Deliverability, set Access to Send Email to All email for production so Salesforce can send both system and user emails.
A few extra checks help avoid surprises:
- For sandboxes, remember that default deliverability often uses System email only, which blocks user emails until you change it.
- Document this setting in your admin playbook so new environments do not ship with blocked email.
With Enhanced Email and deliverability configured, Salesforce can actually send and track the messages your users compose.
3. Verify sender addresses and connected email settings
Sender identity and domain health directly affect whether recipients see emails in their inbox or spam folder. Salesforce lets you control this through org-wide email addresses, user-level addresses, and domain authentication.
Key steps:
- Set up organization-wide email addresses in Setup → Organization-Wide Addresses, then add shared senders like support@ or billing@ and complete the email verification step.
- Decide which profiles can use each org-wide address, and whether it appears as a default no-reply address.
- Work with your IT or security team to configure SPF, DKIM, and DMARC for your sending domains so mailbox providers can trust email coming from Salesforce.
- If you connect Gmail or Office 365, confirm the OAuth connection is active, and test sending from Salesforce so the correct From address appears to recipients.
- Keep a simple checklist for new domains or shared mailboxes that confirms SPF, DKIM, DMARC, and deliverability settings are active before users start sending.
Once sender addresses and domains are verified, you can send email in Salesforce as it aligns with basic deliverability best practices.
4. When automation applies to simple email alerts
Some emails work best as automatic alerts instead of manual messages. Salesforce email alerts and Flow-based automations handle routine notifications so users do not need to remember every follow-up.
Use automation for straightforward, repeatable events, such as:
- Notifying an owner when a high-value lead enters a specific stage
- Sending a confirmation email when a case is created or closed
- Alerting an account manager when an opportunity reaches “Closed Won”
- Reminding internal stakeholders before contract renewal dates
To configure simple alerts:
- Create an email template for each repeatable message.
- In Setup → Email Alerts, define who should receive the alert and which template to use.
- Trigger the alert from a record-triggered Flow or existing workflow rule.
If you prefer a walkthrough, this short video explains how workflow email alerts work inside Salesforce:
Placing these basic alerts early in your setup means your team can focus manual effort on the emails that truly need a personal touch.
How to send an individual email in Salesforce
You can send an individual email in Salesforce by opening the record, launching the Lightning Email Composer, choosing or applying a template, then sending and logging the message to that record.
Salesforce supports one-to-one email sending from leads, contacts, accounts, opportunities, and cases, which keeps communication and CRM data connected. This approach matches how Salesforce documents the process in its official help articles and product walkthroughs.

This section shows the two main ways you can send email in Salesforce and how to personalize each message with templates, merge fields, and attachments.
1. Send Email in Salesforce Using the Lightning Email Composer
The Lightning Email Composer is the built-in window Salesforce provides for writing and sending one-to-one emails. It supports formatting, templates, file attachments, and external email integrations such as Gmail or Outlook.
To send an email with the Lightning Email Composer:
- Open the relevant lead, contact, account, opportunity, or case.
- Go to the Activity panel, and select Email.
- Confirm the To address, and select your From address if Gmail or Outlook is connected.
- Choose a template or write a new message in the rich-text editor.
- Attach files, insert merge fields, preview the email, and click Send.
The message appears as an EmailMessage entry in the activity timeline so your team can see the full conversation.
2. Using the Salesforce Send Email Action on Any Record
The Send Email action is a quick action that lets you send an email in Salesforce from custom buttons placed on the record page. It uses the same composer but gives admins more control over layout and placement.
To set up and use the Send Email action:
- In Setup → Object Manager, open the object, such as Contact or Case.
- Review or create the Send Email quick action.
- Add the fields you want in the action layout, such as To, Subject, and Body.
- Drag the action into the record page via the Lightning App Builder.
- Open the record, click Send Email, and complete the message as usual.
Users often prefer this action because it sits in a consistent location on every record, which reduces confusion and improves adoption.
3. Apply templates, merge fields, and attachments
Templates and merge fields help personalize messages, reduce typing, and keep communication consistent. Salesforce lets you insert placeholders that automatically pull data from the record when you send the email.
Best practices for templates and personalization:
- Use Lightning Email Templates for repeatable messages like follow-ups or reminders.
- Insert merge fields, such as FirstName or Company, so Salesforce fills details automatically.
- Always test templates by sending a message to yourself to confirm the merge fields resolve correctly.
- Attach files from Salesforce so the version stays consistent across your team.
- Standardize which templates sales and support teams use to keep voice and accuracy aligned.
Using templates and merge fields inside Salesforce keeps emails quick, consistent, and always linked to the correct record.
How to Send a Mass Email in Salesforce (Lightning List Email Guide)
You can send a mass email in Salesforce by selecting recipients from a list view or campaign, choosing a Lightning email template, and sending the message through Send List Email in Lightning Experience. This method keeps outreach inside Salesforce and logs each email to the right record.
1. Select recipients using list views or campaigns
Salesforce requires you to pick your audience before you send. This keeps your outreach targeted and reduces delivery issues.
To select recipients:
- Open Leads or Contacts, then create or open a list view with the filters you need.
- Include only records with valid email addresses, and exclude contacts who opted out.
- Select the checkbox at the top of the list to choose the visible records.
- Click Send List Email to start the mass email workflow in Lightning Experience.
- If you use campaigns, open the Campaign, go to Campaign Members, select your members, and begin the same send process.
This aligns with Salesforce’s recommended workflow for starting a mass email from Lightning list views and campaigns.
2. Use Lightning Email Templates for consistent bulk messages
Templates help you send polished, consistent messages at scale. They also simplify personalization.
Best practices when using templates:
- Use a Lightning Email Template designed for bulk outreach.
- Insert merge fields such as FirstName or Company to personalize each message.
- Keep formatting simple to improve compatibility across email clients.
- Send a test email to confirm the merge fields and layout work as expected.
- Avoid attaching large files, since they can slow delivery or cause send errors.
Templates help teams send accurate messages quickly without rewriting content each time.
3. Review and Send Your Salesforce Mass Email (Final Steps)
Once your recipients and template are ready, Salesforce handles the send through the built-in Send List Email tool.
To send and log your email:
- Verify your selected recipients at the top of the Send List Email window.
- Choose your template, and preview a sample recipient to ensure the message looks correct.
- Adjust the subject or body if needed.
- Click Send to let Salesforce process the email in the background.
- Check the Activity timeline or EmailMessage record on each contact to confirm the email was sent and logged.
This ensures your outreach is tracked accurately and stays linked to the right records.
4. Understand Salesforce limits and compliance rules
Salesforce limits mass email sending to protect deliverability. Staying within these limits keeps your messages flowing reliably.
Key points to know:
- Most Salesforce orgs can send up to 5,000 external emails per day from Lightning Experience.
- Salesforce automatically excludes any contacts who opted out of email.
- Internal email addresses do not count toward your external daily limit.
- Use Email Logs to review delivery outcomes or troubleshoot blocked messages.
- If you frequently exceed limits, consider a high-volume email solution built for Salesforce scale.
Managing these limits ensures your bulk sends stay compliant and reach the inbox.
Following these steps keeps your mass email process in Salesforce clear, consistent, and aligned with the platform’s limits and deliverability best practices.
Salesforce Email Sending Issues & Troubleshooting Guide
Email problems in Salesforce usually come from a few predictable places, such as permissions, deliverability settings, or sender configuration. This section gives simple, practical steps to fix the issues most users face when sending emails in Salesforce.
1. Email sends fail or remain queued
When you click Send and nothing reaches the inbox, the issue is usually configuration rather than Salesforce itself.
Quick fixes that solve most send failures:
- Turn on All email for your org: Go to Setup → Deliverability and make sure Access level = All email. In sandboxes, switch from System email only if you want to test real sending.
- Check daily limits: Salesforce enforces strict daily limits on external emails. If your team sends mass emails in Salesforce, you may hit this cap faster than expected.
- Review email logs: Ask an admin to pull an Email Log for the timeframe in question. Look for hard bounces, blocked domains, or provider-specific failures.
- Verify the sender address: Users must send from a verified email or an approved organization-wide address.
- Test with a known, reliable inbox: A simple test to an internal mailbox helps confirm whether the issue is isolated to certain recipients or domains.
2. Missing email options or permission-related blockers
If users cannot see the email button or the email tab in the activity panel, permissions or layout settings are usually the cause.
Check these areas first:
- Send Email permission: Confirm the user has Send Email enabled in their profile or permission set.
- Lightning page and layout setup: Make sure the Email tab is visible in the activity component. Verify that the Send Email action appears in the highlights panel.
- Object and field access: Users must have access to the Email field on leads, contacts, or custom objects for the action to appear.
- Gmail or Outlook integration status: If your org connects to an external email, confirm the user is still authenticated. A simple re-login often restores the send options.
- Record type or page assignment mismatches: Sometimes the email button appears on one record type but not another due to layout assignments.
3. Basic deliverability fixes (spam, blocked, or undelivered emails)
If Salesforce confirms the email was sent but the recipient never sees it, the problem usually lies with domain authentication or spam filtering.
Key checks that improve deliverability quickly:
- Authenticate your domain: Configure SPF, DKIM, and DMARC with your IT team. These tell inbox providers that Salesforce is allowed to send on your behalf.
- Use trusted From addresses: Stick to domain-based emails such as support@yourdomain.com instead of free services like personal Gmail.
- Review template content: Keep messaging simple, avoid excess images, and use clear subject lines. Some filters flag keyword-heavy or promotional content.
- Monitor bounces: Remove invalid or inactive email addresses regularly to maintain a good sender reputation.
- Test across common providers: Check delivery to Gmail, Outlook, and your company domain. Placement in Promotions or Spam often reveals formatting issues.
Once these common issues are out of the way, sending emails in Salesforce becomes predictable, consistent, and far easier for every user on your team.
Conclusion
Sending emails in Salesforce becomes far easier when the settings, permissions, and templates work together. Once the basics are in place, your team can send individual messages, handle bulk outreach, and keep every conversation logged where it belongs. Most blockers come from small configuration gaps, not the system itself, which means the right setup can save hours of frustration for sales, service, and operations teams.
If your team needs to send reliable, high-volume emails from Salesforce or work with custom objects, native features can feel limiting. That is where MassMailer helps. It gives you full control over deliverability, large send volumes, and advanced automation while keeping everything inside Salesforce.
If you want a simpler, scalable way to send email in Salesforce, try MassMailer. It installs quickly, works with standard and custom objects, and removes the sending limits that slow teams down.
Start your free trial of MassMailer and see how much smoother your Salesforce communication can be.
Frequently Asked Questions
1. How do I track email opens and clicks when I send an email in Salesforce?
2. How do I send an email from a custom object in Salesforce?
3. How do I change the From address when sending an email in Salesforce?
4. Why can’t users see the Send Email button in Salesforce?
5. How do I attach files from Salesforce Files when sending an email?
6. How do I test email deliverability in Salesforce before sending to customers?
Start Your Free Trial Today
Experience MassMailer the easiest way to send personalized emails from Salesforce.
Related Blogs

MassMailer Resources


MassMailer Glossary
About the Author

Siva Devaki 
Siva Devaki is the founder of MassMailer Inc., a tool that helps Salesforce users optimize email marketing. A passionate advocate for email marketing, Siva writes and hosts podcasts on the topic, sharing insights to help businesses drive revenue and enhance customer engagement through Salesforce email automation and tracking.