Table of Contents
Google holds a significant place in the overall email space today, with over 1.8 billion Gmail users. This is one of the reasons why the search engine giant considers robust security measures as one of its top priorities to ensure the safety of its users.
One such measure that Google has put in place is the Gmail blacklist.
When an IP address or domain is added to Gmail’s blacklist, it means that emails originating from that source are considered suspicious or unwanted, potentially due to spamming or other policy violations.
In this post, we’ll explore the process of Gmail blocklists, how they work and how you can remove your IP from Gmail’s blacklist to make sure your emails reach Gmail users smoothly.
What is a Gmail Blacklist?
As Google collects important information from Gmail users, it starts creating several rules that eventually filter out troublesome emails or those with some kind of issues. Google then flags such servers’ IP addresses, which are added to the Gmail IP blacklist, preventing such ids from sending emails.
Further, Gmail gathers or collects information from several other public blacklists besides its own data repository. It can thus prevent more unwanted emails or messages from landing in users’ inboxes. This is mainly a preventive measure that Google undertakes to keep the chances of spam to a minimum.
Key Reasons for Being on the IP or Domain Blacklist in Gmail
As soon as you realize that your IP is blocked or blacklisted, the first thing you need to do is to understand the reason why it happened.
Once the cause is identified, you can take corrective measures so you won’t encounter such IP or domain blacklist issues anymore.
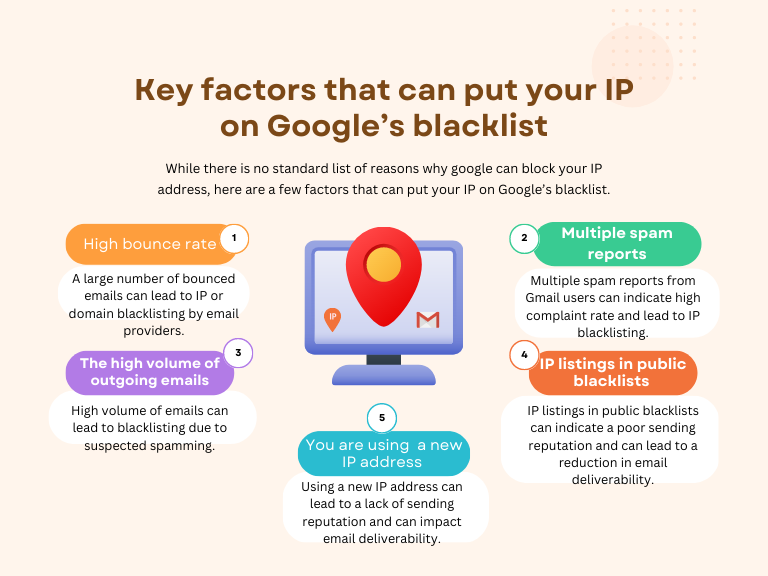
While there is no standard list of reasons why google can block your IP address, here are a few factors that can put your IP on Google’s blacklist:
- High bounce rate or your latest emails were sent to unknown users
- Multiple spam reports from Gmail users. This means that several Gmail users you emailed have marked your mail message as spam
- The high volume of outgoing emails – the volume of your sent emails or the ones going out from your inbox suddenly increased
- IP listings in public blacklists or you are suddenly part of one of the email blacklists that Google monitors
- The emails you have sent land in spam traps or nonfunctional email addresses designed to catch malicious intent or spammers
- You are using either a new IP address or multiple IP addresses at the same time
- You are not following the protocols set for email authentication or have not been able to pass one of their authentication checks.
- You have either incomplete DNS records or the same has been incorrectly configured.
Impact of Being on Gmail’s Blacklist: What It Means for Your IP and Business
If your IP is on Gmail’s Blacklist, it means that any email you send will not get delivered to the intended recipient. But email delivery issues are only the most immediate problem.
Here are a few more challenges you could face:
• Reputation Damage: A blacklisted IP damages its reputation. This means not just Gmail, but other email providers could also block your IP address.
• Loss of Recipient Trust: If your recipients, who are your customers or potential customers, constantly receive emails with cautionary security alerts, they could lose trust in your business.
• Negative Impact on Business: This impact on business communication and marketing campaigns could reduce leads, conversions, and brand image, leading to potential financial losses.
Additionally, having your IP address blacklisted can result in operational disruptions and increased efforts to resolve the issue. Also, it can impact your overall email deliverability across different email providers, not just Gmail. When your IP address is blacklisted, it signals to email providers that there may be issues with the sender’s reputation or the content being sent.
How To Remove Your IP From Gmail’s Blacklist
When Gmail blacklists your IP or email, you will get a bounce back with the error codes 421 or 550 while sending emails to Gmail accounts.
In this case, you are required to contact Google directly to submit a removal request.
Here is the process you can follow:
1. If you’re sending bulk emails and still getting bounce notifications with the error code ‘400’, you first need to go through Google’s Bulk Sender Guidelines. This should be followed by submitting a removal request with Google using the Bulk Sender Contact Form, as shown below.
Before submitting a request to Google’s contact forms, you also need to ensure the following in the Bulk Sender Guidelines:
- Authentication: It is important to make sure that you are only sending authenticated emails via your Gmail account.
- Email Formatting: Make sure to pay attention to all formatting guidelines to improve your email deliverability.
- Subscription and Unsubscription of emails: Here, you need to ensure that you are following all the email list management best practices properly.
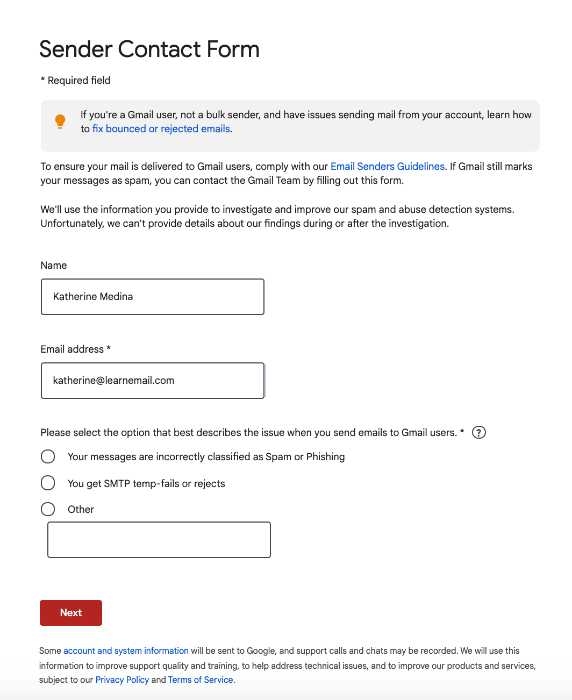
2. Once you are sure that you are following all the mentioned best practices, you need to fill out a Bulk Sender Contact Form, where you will have to follow the below steps:
- Fill out your contact details, including your full name, email address, and the reason you’re filling out the contact form, which could be because:
a. Your email or message was incorrectly classified as spam
b. SMTP Temp-Fails or Rejects
c. Any other issue
3. Besides this, you also need to add the headers of the messages you sent to the Gmail account that was marked as spam/phishing (the message should not be older than 12 days).
This is the stage where you can submit the form.
Note: Gmail, in most cases, does not reply to your submission. However, they usually process your submitted form within 10-15 days.
Guide on How To Remove Your IP From Gmail’s Blacklist
Tips To Avoid Ending Up on Gmail Blacklists
If your IP is flagged on the Google blacklist, instead of struggling to remove your email address from the list, it is far easier to stay away from these block lists in the first place.
The most troublesome emails that you need to avoid here are spam emails. Besides these spam traps, below are some of the other tips that you need to consider here to remain out of the Gmail IP or domain blacklists:
A. Clean Up Your Email Lists Regularly
It is important to keep your email lists clean of inactive, unknown, and unresponsive contacts to avoid being blacklisted by Google. M
ake sure to send emails to legitimate users only, as it not only enhances your email deliverability but also improves your sender’s reputation.
B. Use the Email Opt-In Option
One of the best ways to prevent IP blocking by Google is to not send any emails from your inbox to contacts who haven’t permitted you by incorporating email opt-in.
This will result in higher-quality email subscribers who have either allowed you or given permission to send them emails and are more willing to interact with you and engage with what you have to offer.
C. Avoid Buying Email Lists
The best approach to growing your email subscribers is by organically building your own email lists. Make sure not to purchase ready-made email lists as it is not only illegal but also runs the risk of compromised quality of emails.
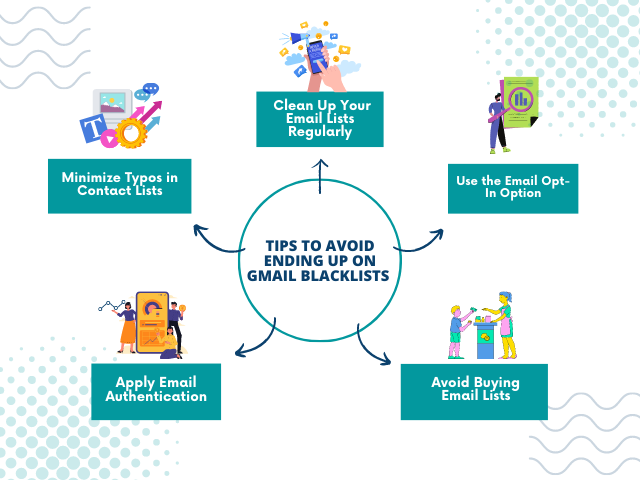
D. Apply Email Authentication
Make sure to follow strict email authentication protocols such as DKIM, SPF, and DMARC, as they can help you increase trust in yourself as a sender.
These configurations highlight you as a trusted email sender and taking proper steps to ensure everyone’s safety.
E. Remove All Bounced Email Addresses from Your List
A high bounce rate is one of the main reasons to end up on the Gmail IP blocklist. Therefore, as soon as you find that an email sent from your inbox is bounced, make sure to remove that email address from your primary emailing list.
The best thing you can do here is to remove them completely from the mailing list or move them to a different list you rarely use.
F. Minimize Typos in Contact Lists
Typing errors are quite common when customers enter their respective email addresses to subscribe to various email campaigns.
However, the high frequency of these errors can soon result in high bounce email rates that will negatively impact email deliverability. Therefore, make sure to minimize these typos or verify them using various tools available.
In Conclusion
Being on the Gmail IP or domain blacklist is the worst nightmare of email senders. Getting added to this blacklist can be very challenging as it will result in all your future emails/messages bouncing back, thus hampering your sender’s reputation significantly. Besides, it will also impact your email deliverability negatively.
To remove your IP from the Gmail blacklist, you need to send a request for removal from Google itself. Once done, you need to make sure to take the appropriate steps to avoid these IP blacklists in the future.
By following the above-mentioned tips, you can stay away from the Gmail blacklist and also enhance your reputation as a sender.
Are you also looking to build your email marketing strategy and avoid Gmail blacklisting?
Look no further than MassMailer. We offer powerful email marketing solutions to help you create, send and track emails that your customers look forward to.
Get started with your MassMailer trial today.


 View Presentation