


Table of Contents
Automating mass emails is important for enhancing your marketing, sales, or customer engagement initiatives withinSalesforce. This process ensures you maintain timely and relevant communication with your audience, including leads, contacts, and custom object records.

MassMailer is a powerful email marketing tool that works effortlessly with Salesforce. It makes sending bulk emails to targeted list views incredibly efficient.
This blog guides you through the process ofautomating mass email sending to a list view in Salesforcewith Salesforce’s Flow Builder and MassMailer’s Apex Action class. This allows you to send personalized emails efficiently and effectively.
Why Automate Mass Emails to a Salesforce List View?
There are many advantages to automating the process of sending mass emails, including:
- Efficiency: Automating repetitive tasks boosts productivity, allowing your team time to concentrate on more important goals.
- Accuracy: Automating helps minimize manual errors, ensuring emails reach the right recipients at the perfect moment.
- Personalization: Salesforce List Views allow you to focus on particular segments of your audience, enhancing the relevance of your emails.
Combining Salesforce Flow Builder and MassMailer allows you to fully leverage these benefits while managing everything seamlessly within the Salesforce platform.
Step-by-Step Guide to Automating Mass Emails Using MassMailer
Here's a guide to how you can automate mass emails using MassMailer:
Step 1:Create a Salesforce List View
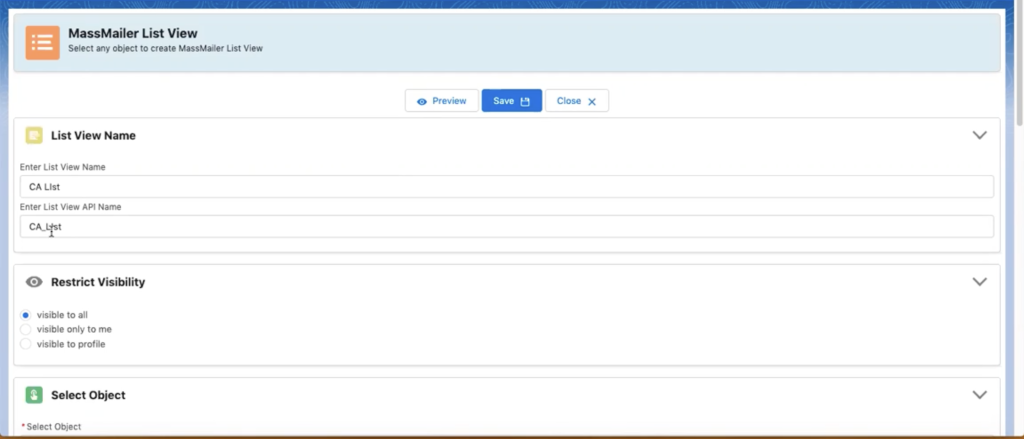
Start by creating a Salesforce List View to define the audience for your email campaign. You can create List Views for standard objects like Leads and Contacts or custom objects.
- Go to the Object Manager in Salesforce and select the object (Leads, Contacts, or any custom object).
- Create a new List View by applying filters such as lead status, geographic location, or industry.
- Save the List View with a recognizable name for later use in your email automation.
Step 2: Set Up Your Salesforce Flow
Salesforce has moved towards Flow Builder as the primary automation tool for processes like mass email sending, and it’s strongly recommended over older tools like workflows and Process Builder.
To begin automating mass emails, create a flow by following the steps below:
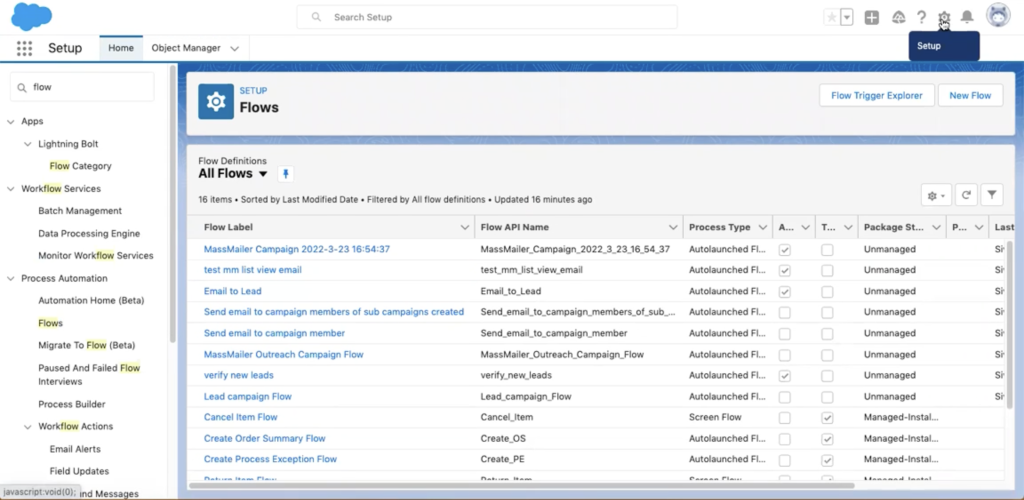
- Navigate to Setup in Salesforce and search for Flows under Process Automation.
- Select Create New Flow, and define the criteria to trigger your email automation. For example, you might want to send emails on a schedule (e.g., daily or weekly) or based on specific events (e.g., new leads being added).
The Flow Builder allows complete customization to automate emails according to your business needs.
Step 3: Edit the MassMailer Apex Action Class
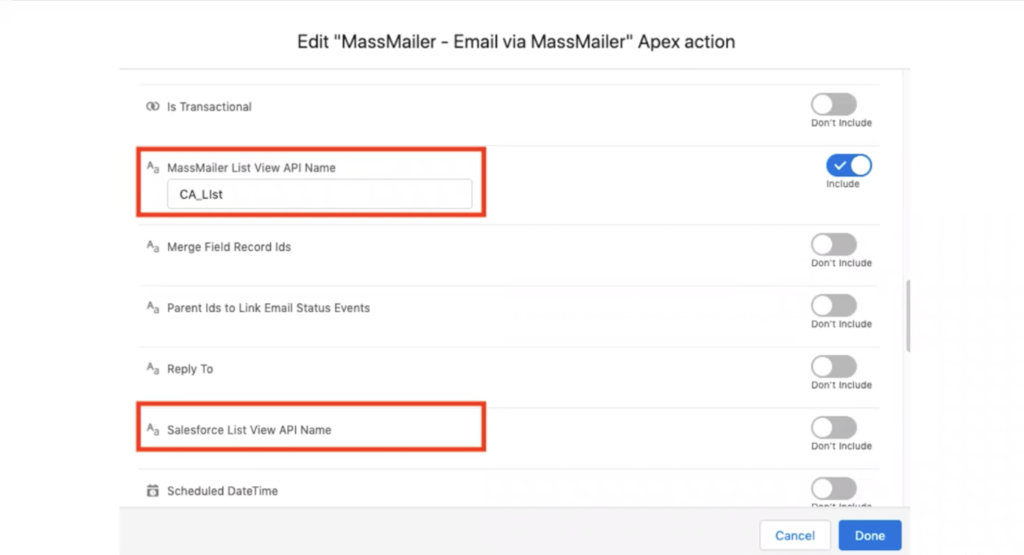
Once you’ve set up your flow, you must use the MassMailer Apex Action to send emails. MassMailer integrates with Salesforce Flow Builder through a specific Apex action called MassMailer - Email via MassMailer, which handles the email-sending process.
Here are the key parameters you need to configure for the MassMailer Apex Action:
- From Address: The email address that will appear as the sender.
- From Name: The sender’s name (e.g., your company name).
- Salesforce List View API Name: This is the API name for the List View that you created earlier. You can find this in the Details section of your List View.
- Template ID: This is the ID of the email template you want to send. Ensure the template is pre-built and ready to use.
- Record ID: You will need to pass a hard-coded record ID that exists within your Salesforce instance. This Record ID should belong to your target object (Contacts, Leads, or a custom object). The record ID ensures the flow works but won’t affect which contacts receive the emails, as the List View determines them.
You should only fill in one List View API Name field (the Salesforce List View API Name or the MassMailer List View API Name). Do not populate both, as this could cause an error.
Step 4: Test the Automation
Once your flow is configured and all necessary parameters are set, testing the automation is important to ensure everything works as expected.
Salesforce allows you to run your flow in Debug Mode to simulate the process without sending emails. Use this mode to verify that your flow triggers correctly and that the emails are sent to the correct List View recipients.
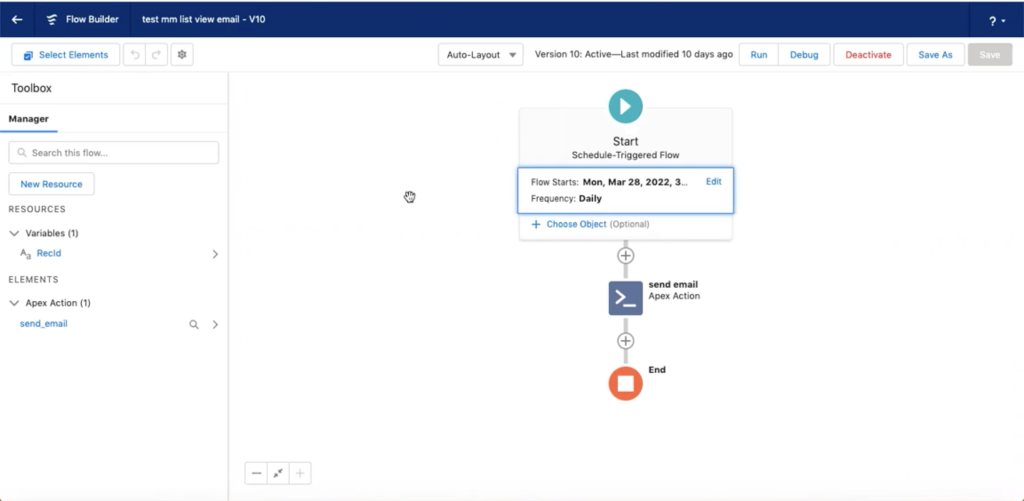
Step 5: Schedule or Trigger the Flow
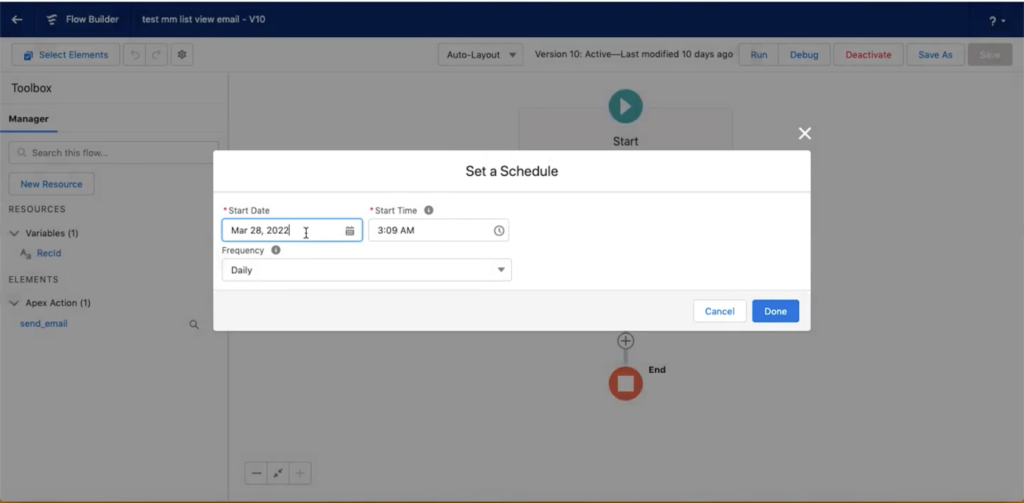
Now that the flow works correctly, you can decide how often or under what circumstances it should run. Some examples include:
- Scheduled: Send an email every day or every week to a particular List View.
- Trigger-based: Send emails when specific actions occur, such as adding a new lead or closing a deal.
This flexibility ensures that your email automation fits your exact business requirements.
Why Choose MassMailer for Salesforce Email Automation?
MassMailer is a specialized tool that integrates directly into Salesforce, making it easier to send mass emails without exporting your contact list or managing campaigns from a separate platform. It excels at helping Salesforce CRM users by offering several advantages, including:
- Seamless Salesforce Integration: Unlike external tools, MassMailer is built into Salesforce, allowing you to use your existing data without any extra steps.
- Automation Capabilities: Use Salesforce’s Flow Builder to automate emails to list views and ensure your campaigns reach the right audience without manual intervention.
- Tracking and Analytics: With MassMailer, you get built-in email tracking capabilities, including opens, clicks, bounces, and unsubscribe reports—all within Salesforce.
- Custom Email Templates: Create personalized email templates automatically pulling in Salesforce data, such as a recipient’s first name or lead status.
Common Challenges in Salesforce Email Automation
Here are some of the common hurdles you may come across while automating Salesforce email:
Challenge 1: Salesforce Workflow Limitations
Salesforce’s older workflow automation tools have limitations regarding mass email functionality. For instance, they require more manual steps and don’t allow for highly dynamic List Views.
Solution:
You can overcome these limitations by using Salesforce Flow Builder and MassMailer’s Apex Action class and streamline the entire email process.
Challenge 2: Handling Dynamic List Views
Salesforce List Views are often dynamic, changing frequently based on real-time data updates. Managing these dynamic lists can be tricky when sending mass emails.
Solution:
MassMailer ensures that your mass emails are sent to the current, most up-to-date List View every time the flow runs, removing the need for manual updates or monitoring.
Conclusion
Automating mass emails to a Salesforce List View using MassMailer is an easy and effective way to manage large-scale email campaigns. Using Salesforce Flow Builder and the MassMailer Apex action, you can schedule and send emails without manual effort, ensuring your team stays focused on strategic initiatives.
Want to experience the power of email automation within Salesforce? Explore MassMailer today and discover how easy it is to automate mass emails and improve your campaign performance.Sign up for a free trialand take youremail marketingto the next level.
Want to learn more about MassMailer and how it can optimize your Salesforce email campaigns? Check out ourYouTube channelfor more tutorials and tips.
Request for a free demoto get started!
Start Your Free Trial Today
Experience MassMailer the easiest way to send personalized emails from Salesforce.
Related Blogs

MassMailer Resources


About the Author

Siva Devaki 
Siva Devaki is the founder of MassMailer Inc., a tool that helps Salesforce users optimize email marketing. A passionate advocate for email marketing, Siva writes and hosts podcasts on the topic, sharing insights to help businesses drive revenue and enhance customer engagement through Salesforce email automation and tracking.