 View Presentation
Table of Contents
Email remains one of the chief marketing channels that enables companies to address their patrons one-on-one. With that said, not all campaign emails reach the recipient’s inbox due to various reasons, like an invalid email address.

This blog will help you understand how to validate every lead email automatically via MassMailer to ensure your campaigns do not bounce. Let’s get started.
Verifying Emails Via MassMailer
Your business captures leads from diverse sources, such as manual entries, Salesforce imports, or through other channels and forms. Sometimes, however, you cannot be completely sure about the lead data that your forms fetch. MassMailer helps you verify and validate the emails automatically your forms capture to prevent bounces and reduce the bounce rate.
There are two ways in which you can validate your emails in MassMailer:
- Validate emails after your records are saved in Salesforce using the “MassMailer Verify” button.
- Validate the emails using MassMailer’s Auto-Validate feature.
This blog focuses on using the auto-validate feature to verify lead information via MassMailer. You can use this feature on all contacts, including the ones gathered from web-to-lead forms. You can use MassMailer to validate any object or email that is enabled in MassMailer.
How Does it Work?
In Salesforce Process Builder, there is an Apex Class called “Verify Via MassMailer.” When you define a process in the Process Builder, you must invoke this verification action to validate emails via MassMailer.
Please note: MassMailer currently does not have a packaged process or flow to execute this action, but stay tuned for future updates. Meanwhile, if you are not familiar with the process builder, you can contact your Salesforce admin for help.
When a lead is captured, it is funneled through a customizable “Check” that you can configure based on your requirements. For example, you can configure it to validate only the emails captured from web forms.
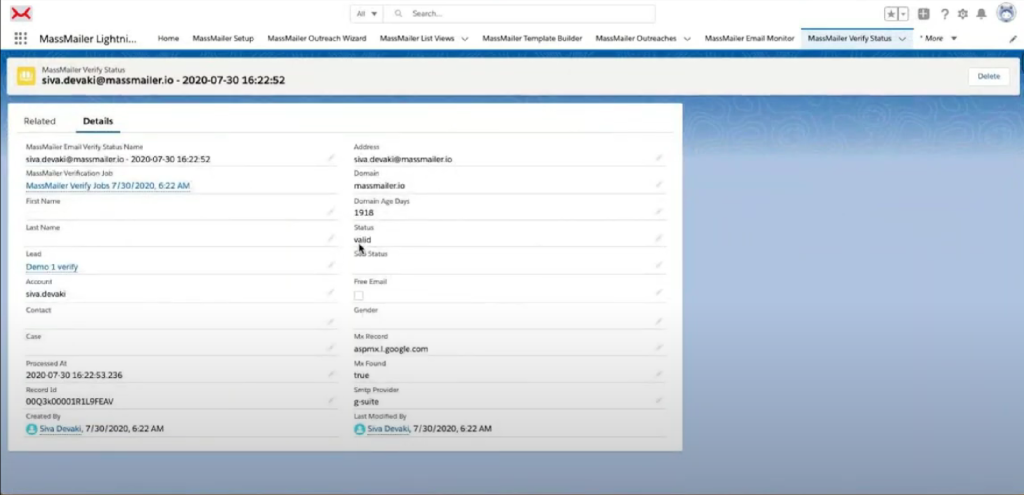
Once MassMailer verifies and validates a contact email, it is stored with the following information:
| Address | mmtp_provider |
| status | firstname |
| Substatus | lastname |
| Account (email ID without the domain) | Gender |
| Domain | City |
| did_you_mean | Region |
| domain_age_days | Zipcode |
| free_email | Country |
| mx_found | Processed_at |
| mx_record |
MassMailer stores two types of statuses for email verification:
| status | Valid, invalid, catch-all, unknown, spamrap, abuse, do_not_mail |
| Sub-status | Antispam_system, grelisted, mail_server_temporary_error, forcible_disconnect, mail_server_did_not_respond, timeout_exceeded, failed_smtp_conection, mailbox_quota_exceeded, exception_occurred, possible_traps, role_based, global_suppression, mailbox_not_found, no_dns_entries, failed_syntax_check, possible_typo,_unroutable_ip_address, leading_period_removed, does_not_accept_mail, alias_address, role_based_catch_all, disposable, toxic |
Guide on How to reduce the bounce rate by auto validating emails in MassMailer
How to Auto-Validate Emails via MassMailer
Follow the simple steps below to get started:
- Login to your Salesforce and navigate to the Process Builder interface. For demonstration purposes, the verification process flow has already been created. Here, when you click on “Lead,” you will see customization options to the right. You can choose when the verification process is initiated for that lead.
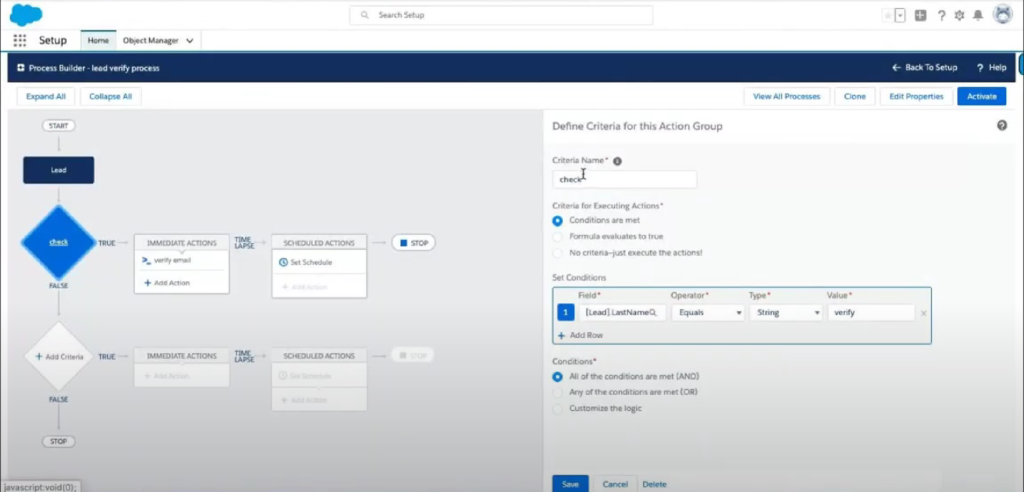
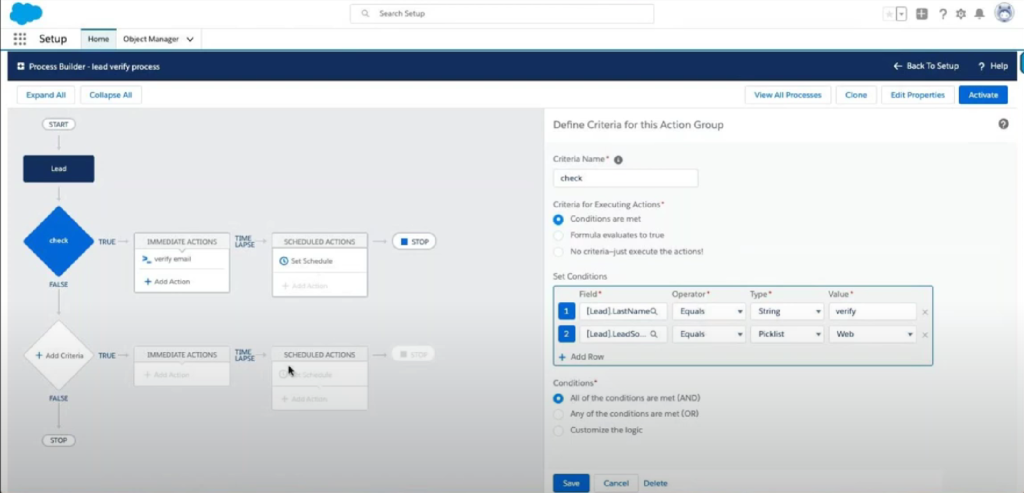
- Upon selection, you must also specify new criteria for set conditions that would validate a lead. For example, specify field (like last name), operator, type, and value. You can add more criteria depending on your requirements. Once done, click on “Save”.
- Click on “Check” and customize the “Call Apex” section according to your requirements.
- Once you are done customizing the process, click on “Activate” on the top right corner.
- Next, go to Salesforce home and navigate to the “Leads” tab.
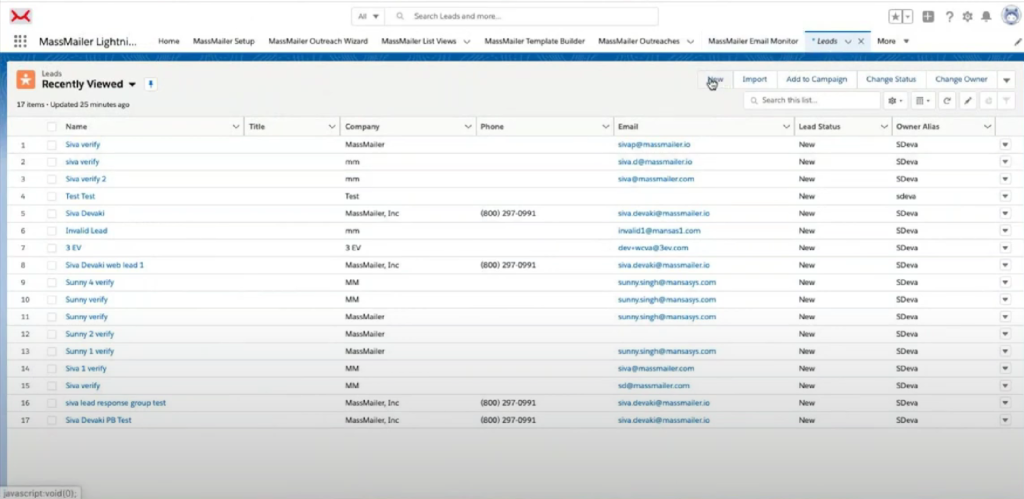
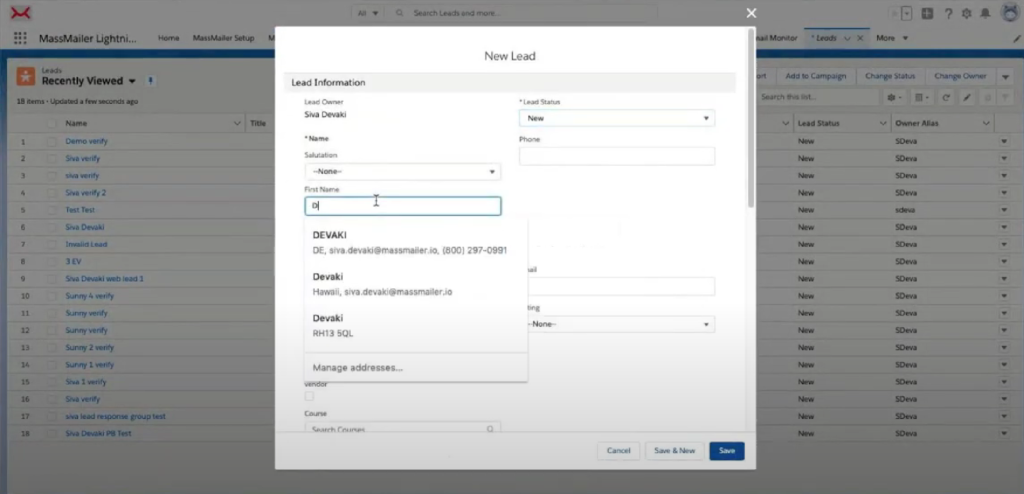
- Create a new lead by clicking on “New” in the menu bar of that tab. Fill in all the details such as first name, last name, company, title, email, etc.
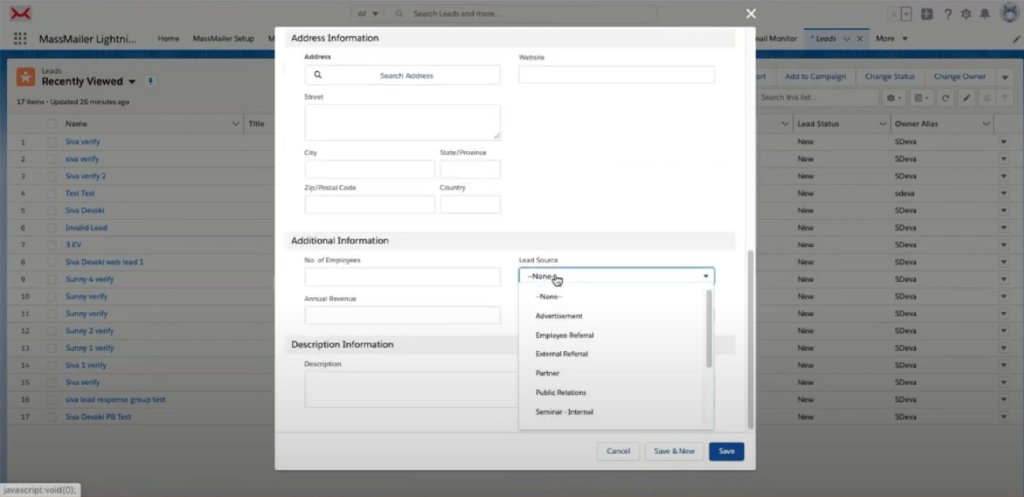
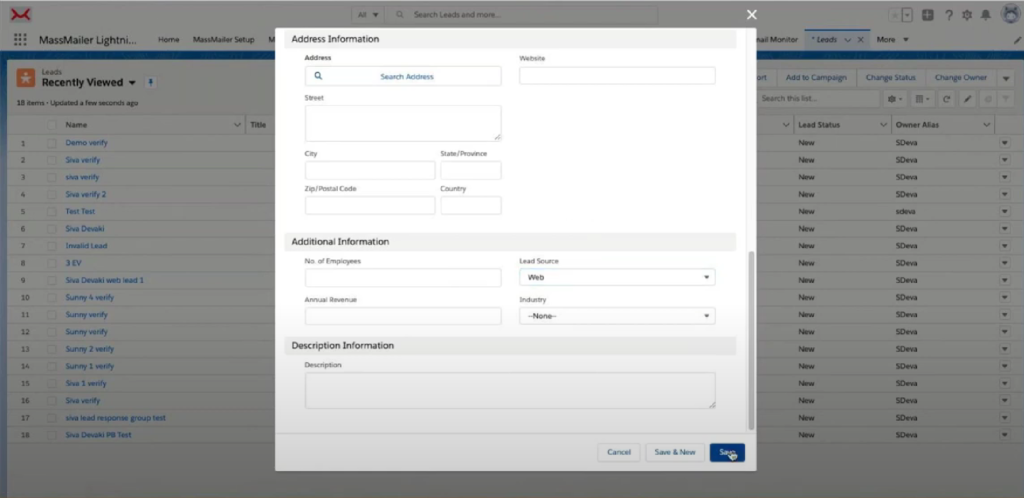
- Scroll down in the same popup window to the “Additional Information” section and select the “Lead Source” (for example, web, word of mouth, etc.) from its dropdown menu. Once you are done, click on “Save.”
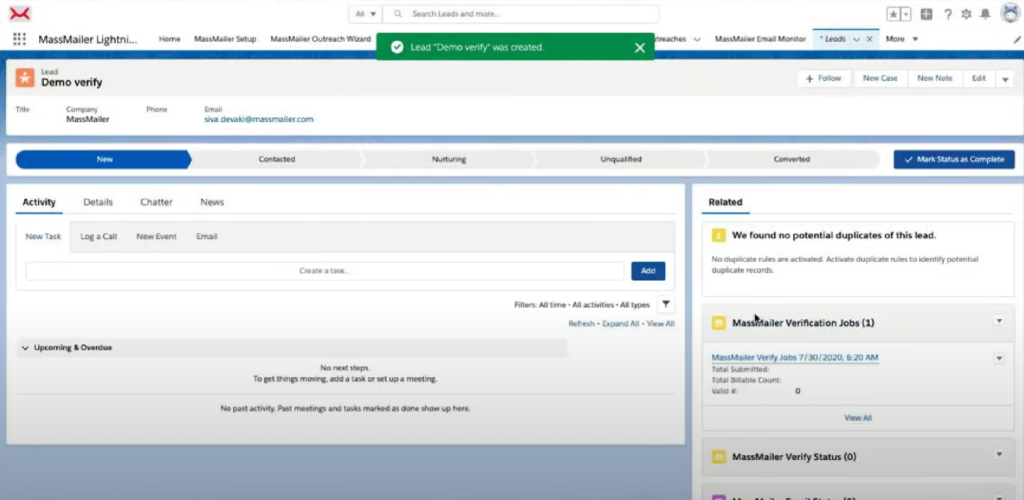
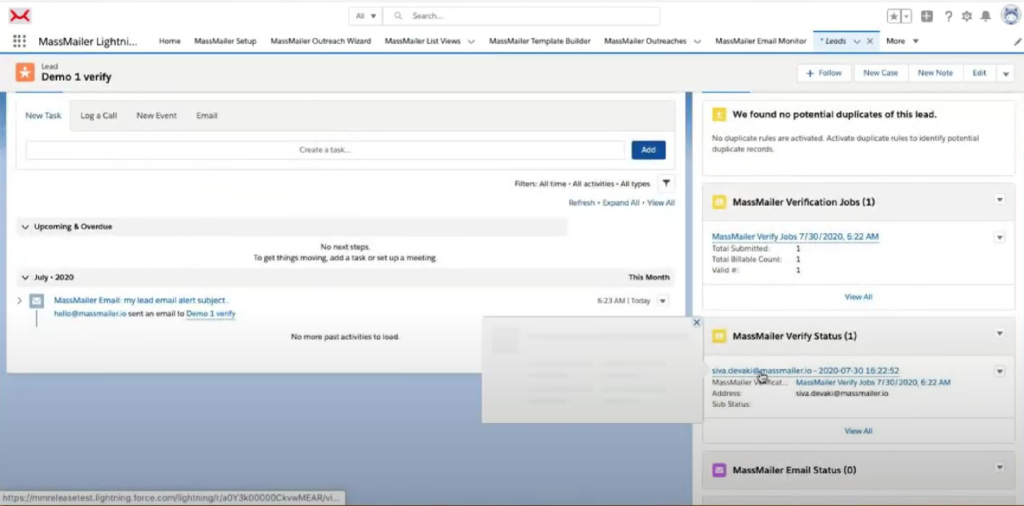
- In the interface that opens, you will notice that your new lead is created and a verified job is submitted in the right sidebar.
- Refresh the page. Click on the URL in the “MassMailer Verification Jobs.”
- The new page will display parameters like “Job status”, “Campaign”, etc. Click on the new lead you created under the “Lead” field.
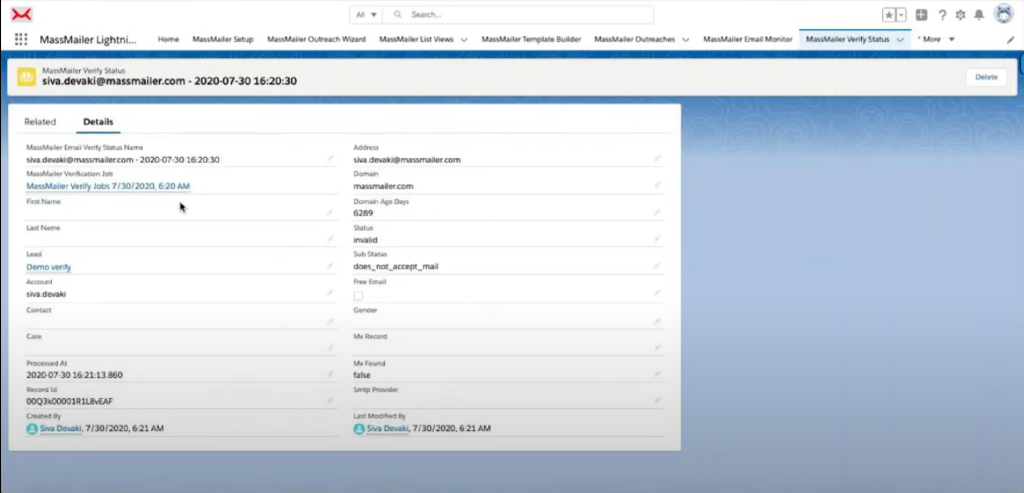
- Scroll down in the right sidebar to the “MassMailer Verify Status” section. You can see the status and sub-status of your new lead.
If you wish to conduct a quick auto-verification test on a valid email address, follow the steps below:
- Go to the “Leads” tab in the MassMailer Lightning console.
- Click on “New” and fill in all the information for a test email ID that you know exists and is working.
- Scroll down to select “Web” as the lead source in the popup window, then click “Save.”
- Refresh the page. You can see that the verification job for this new lead is also created.
- Scroll down in the right sidebar and click on “MassMailer Verify Status.”
- In the new window that opens, you will see that this test email’s status is “Valid.”
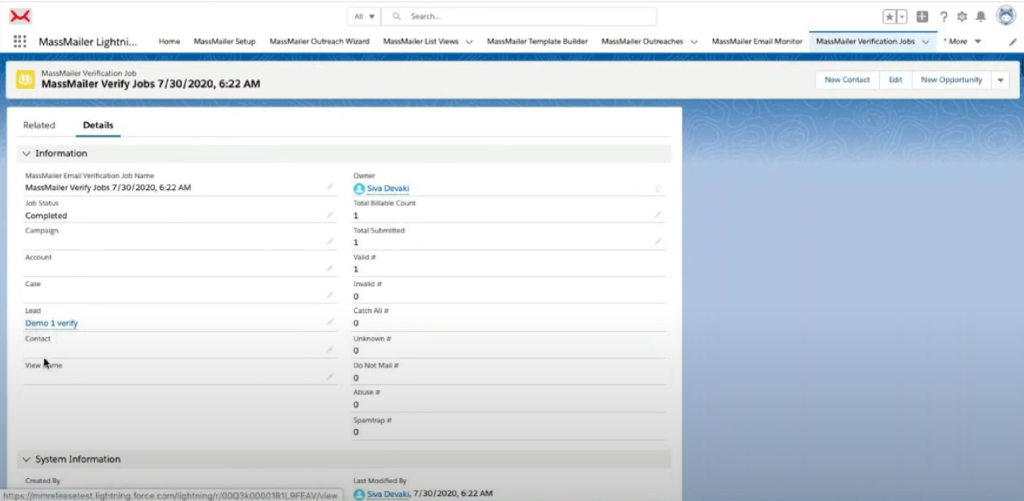
- Go back to the Lead page and click on the verification job object. Click on the lead you have verified.
- The new window displays all the details of the new lead you just verified. It also shows the “Total Billable Count,” which tells you how many more emails you can auto-verify via MassMailer before your credits run out. If you require more credits, you can purchase the most suitable package.
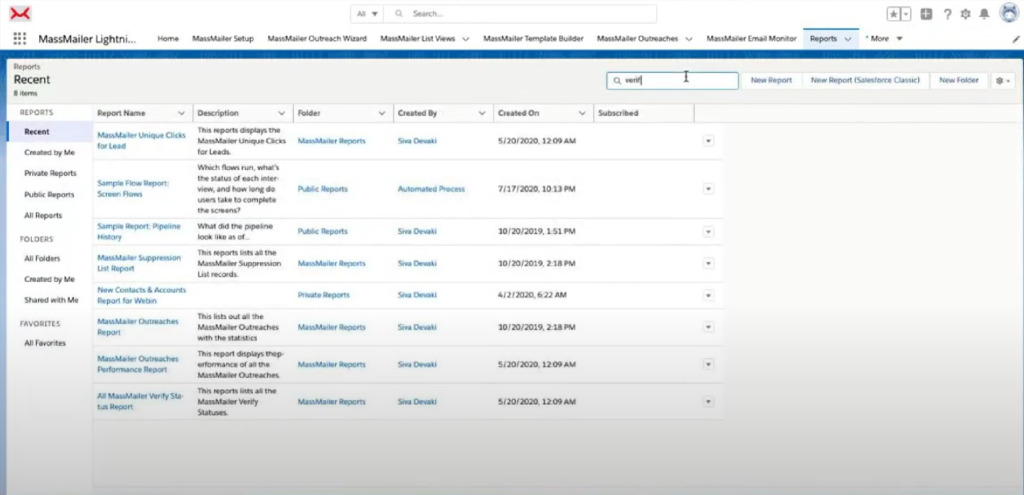
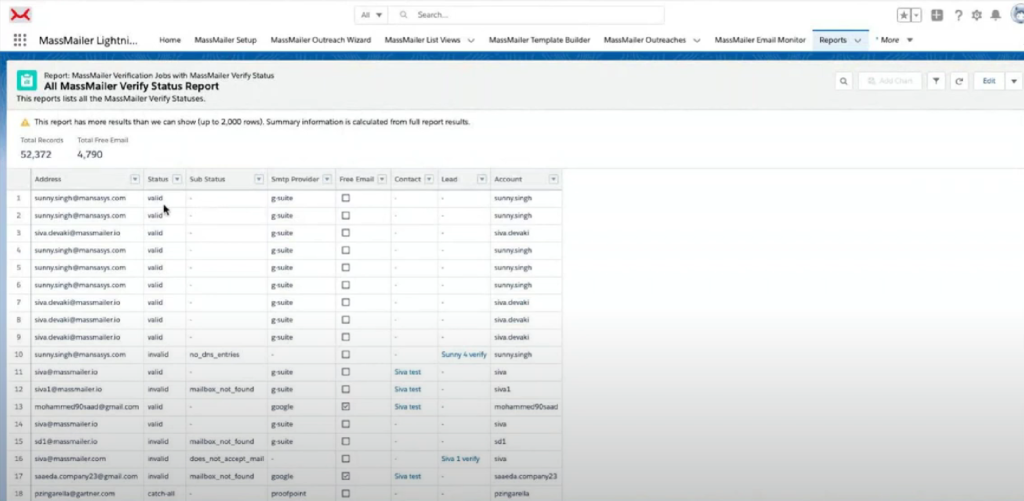
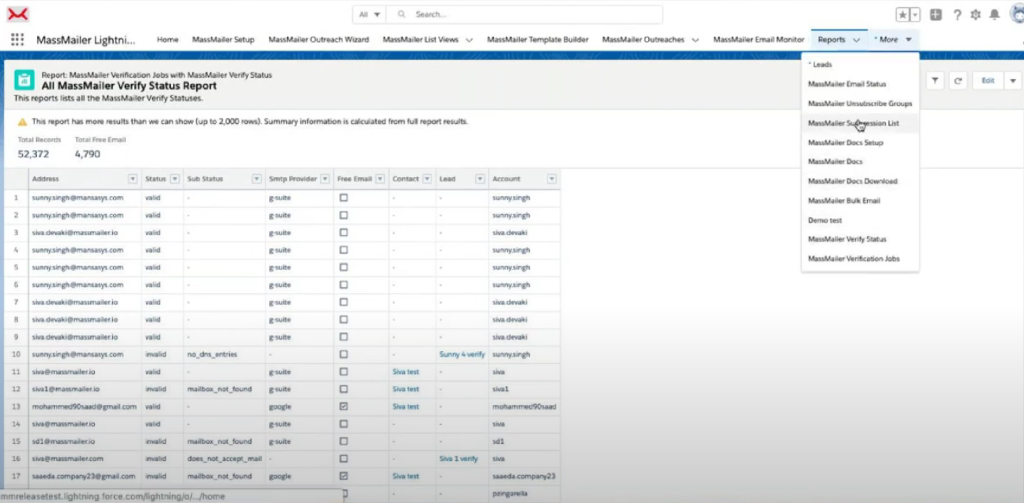
- Once you are done checking the verification process, you can also view reports for the same. Navigate to the tabs bar and click on “More.” Select “Reports” from the dropdown menu.
- In the search bar of the tab, type “Verify.” In the results, you will see all the MassMailer verification status reports.
- In the new interface that opens, type “Verify” again to search for verification-specific reports.
- The report may take a few seconds to load completely. Once it does, it will show parameters such as the number of records, the total number of free emails, the status, the sub-status, the contact, and the account.
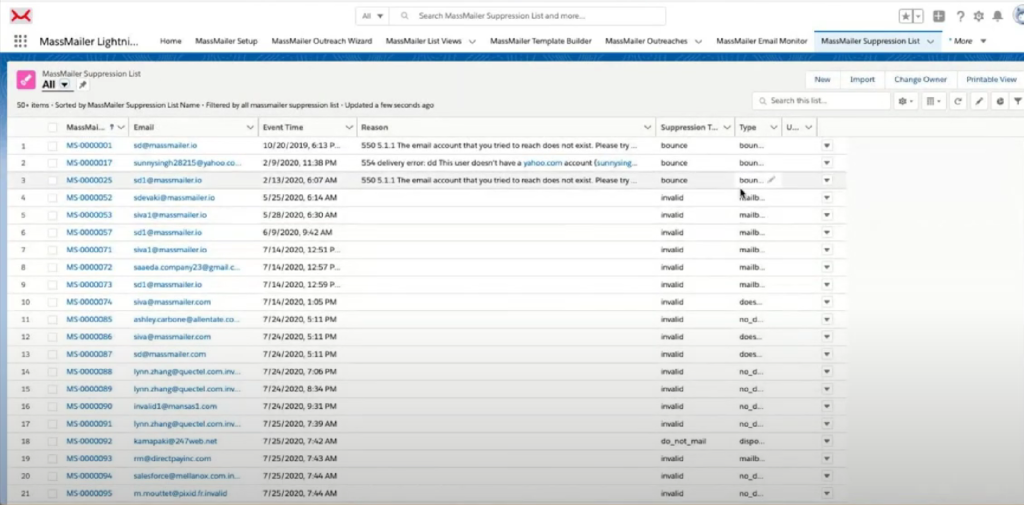
- If you want to see the suppressions, navigate to the tabs bar and click on “More.” Then click on “MassMailer Suppressions List” from the dropdown menu.
- The new window will display all the records that have been automatically suppressed by MassMailer. Click on any record to view details.
- To view the API names, navigate to Salesforce Setup and click on the “Object Manager” tab.
- In the “Quick Find” box, type “Lead.” In the left sidebar, click on “Fields and Relationships.”
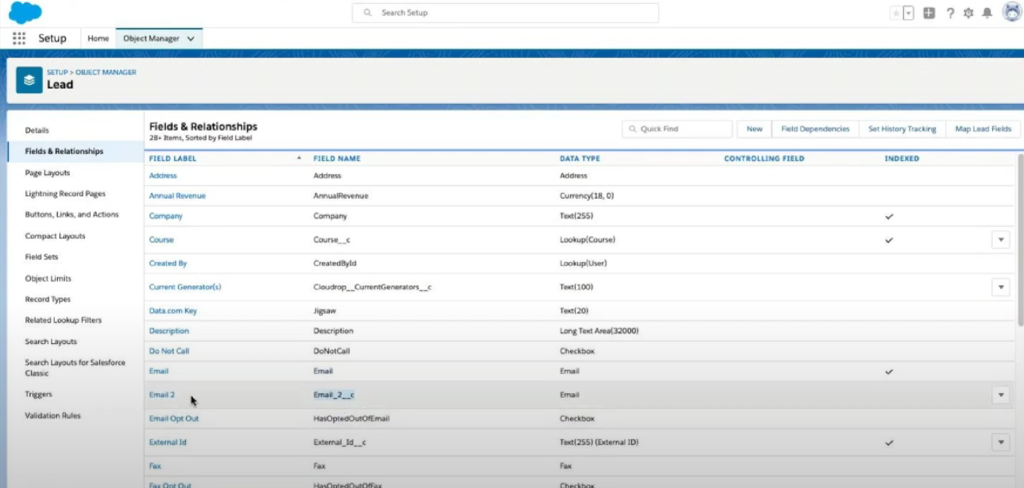
- In the list that appears, the field label “Email” is called the API name. Under the “Field Name” column, you will find the API name of a lead. If you want to validate this, copy it from here and go back to Process Builder.
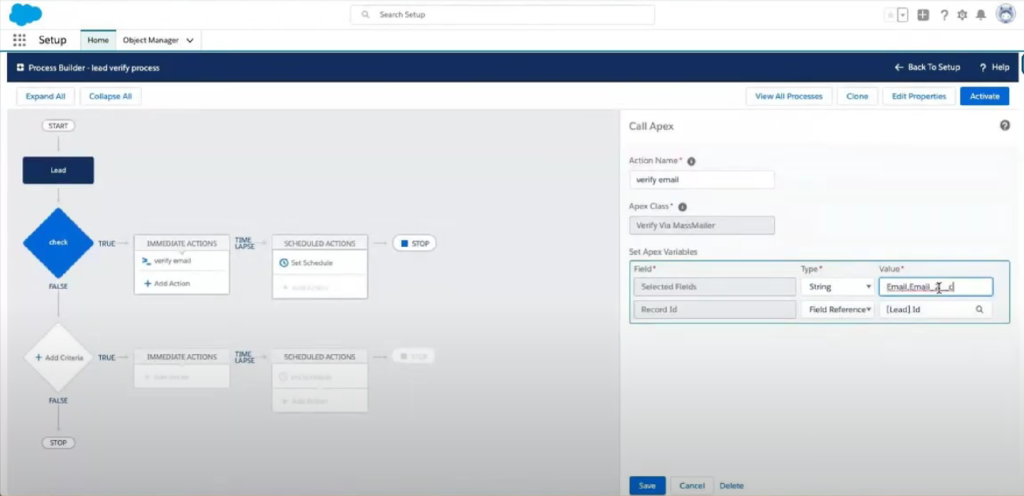
- In the Process Builder, click “Check” and navigate to the right sidebar. Scroll to the “Set Apex Variables” section and paste the copied value after adding a comma to the “Value” field. Click on “Save.” Don’t forget to activate the process once you are done.
Note: You can only verify the API names if their data type is “Email.”
Streamline Your Email Workflows with MassMailer
MassMailer is a Salesforce-native email app that allows you to customize your bulk email and workflows in a few simple steps. Validate every email effortlessly with MassMailer’s friendly UI and simple process builder to customize how verification initiates.
MassMailer also allows you to verify and validate email addresses from various other points in the UI, including campaigns, lists, and more.
Using MassMailer, you can easily remove spam traps, verify emails, monitor your email reputation, and more. Visit the website today to get started on your 15-day free trial.
About the Author

Siva Devaki 
Siva Devaki is the founder of MassMailer Inc., a tool that helps Salesforce users optimize email marketing. A passionate advocate for email marketing, Siva writes and hosts podcasts on the topic, sharing insights to help businesses drive revenue and enhance customer engagement through Salesforce email automation and tracking.